Annotations
|
Reconstructor® allows you to place annotations of your 3D models in the scene. These annotations may appear as items in your project. Annotations can be of three types:
|
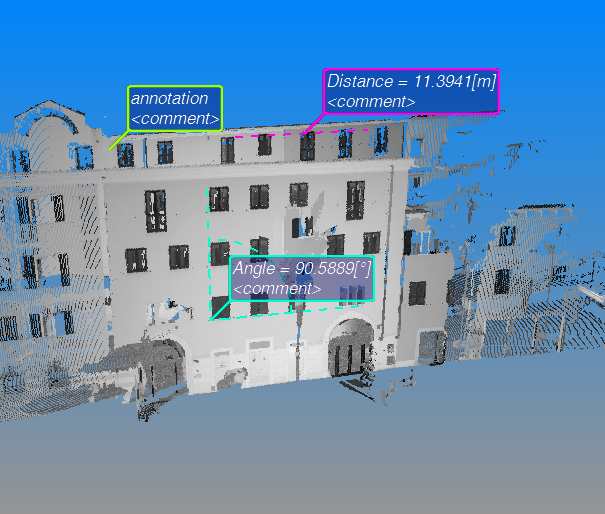
You can create an annotation via the menu options in the Results & Analyses->Measures & Notes -> Annotation menu or the corresponding buttons in the top toolbar. To create a punctual annotation, select the “annotation” button from the aforementioned menu and double-click on any point of your 3D scene.
Distance annotations are used to measure the distance between two points in the 3D scene. Select Output->Measures & Notes ->Distance, then press the left mouse button on the first point of the segment to measure, move the mouse and release the left button on the end point of the segment. Reconstructor® shows you the distance measured and asks you whether you want to store it into the project.
Selecting the Output->Measures & Notes ->Angle button, you have also the option to measure angles. You define the angle you want to measure by left-clicking on three points of your 3D scene.
In the properties of any annotation, you can change its color ID, edit the displayed comment, define a hyperlink for an annotation (interesting feature to add meta-information to your 3D scene from e.g. the web) and choose whether to draw the annotation or not.
Annotations are stored in form of point collections. Therefore, they don't have a pose matrix like all the other project entities and cannot be moved or rotated through Adjust pose or the Pose dialog.