Create a Reference Map (in Reconstructor®)
This function is available only for AC and MS HERON® systems.
|
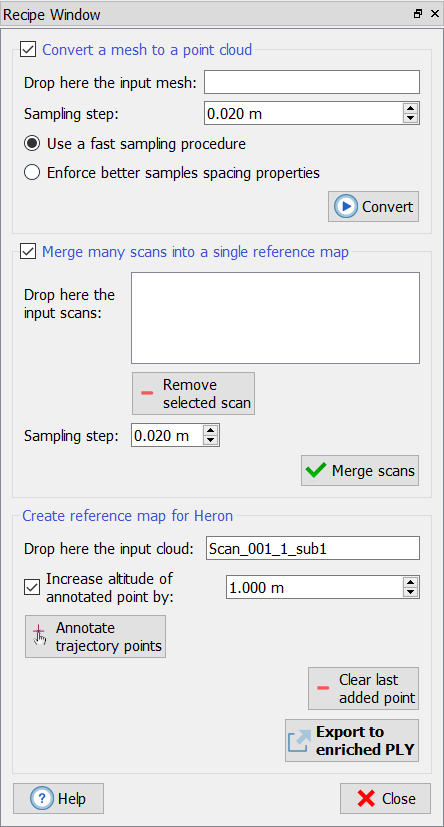
Select this tool to create a point cloud to be used as Reference Map in change detection verification (Tracker Live tool in Heron® Live). |
Both point clouds, clusters of point clouds and meshes can be used as reference maps.
The output is an enriched .ply point cloud, including also the information of the explorable space, that can be imported in the Create Reference command.
Reference Map from mesh models
If you need, for example, to compare your real time acquisition with a BIM model, you need to import the 3D mesh model in Reconstructor® (also BIM models are supported in .ifc format).
The first step is to convert the mesh to a point cloud: flag the option Convert a mesh to a point cloud in the recipe window.
Drag&drop the mesh you want to convert from the Property Browser to Drop here the input mesh place then choose the sampling step to determine the density of the extracted point cloud. It defines the minimum distance between the points, that are regularly distributed, according to the 3D mesh shape.
Select one of the following methods to proceed:
- Use fast sampling procedure converts the mesh picking a point about every sampling step.
- Enforce better sample spacing properties converts in a better way the mesh, respecting more faithfully the sampling step; it takes longer than the previous method and requires more amount of RAM. Not recommended for large meshes or for very high sampling.
At the end click Convert button.
A new unstructured point cloud will be added to the Project Window.
Reference Map from point clouds
If your reference map should be composed by many point clouds, you have to merge them in a single point cloud.
To do it, check Merge many scans into a single reference map.
Drag&drop the point clouds you want to cluster from the Property Browser to Drop here the input scans place then choose the sampling step to determine the density of the extracted point cloud. It defines the minimum distance between the points, that are regularly distributed, according to the original point clouds.
At the end click Merge scan button.
A new unstructured point cloud will be added to the Project Window.
At this point you are ready to export the reference map...
Create Reference Map for Heron
Drag&drop the point cloud from the Property Browser to the designed place.
The point can be:
- a single point cloud already present in your project
- a point cloud created from merge in the previous steps.
In case 1, go directly to this point.
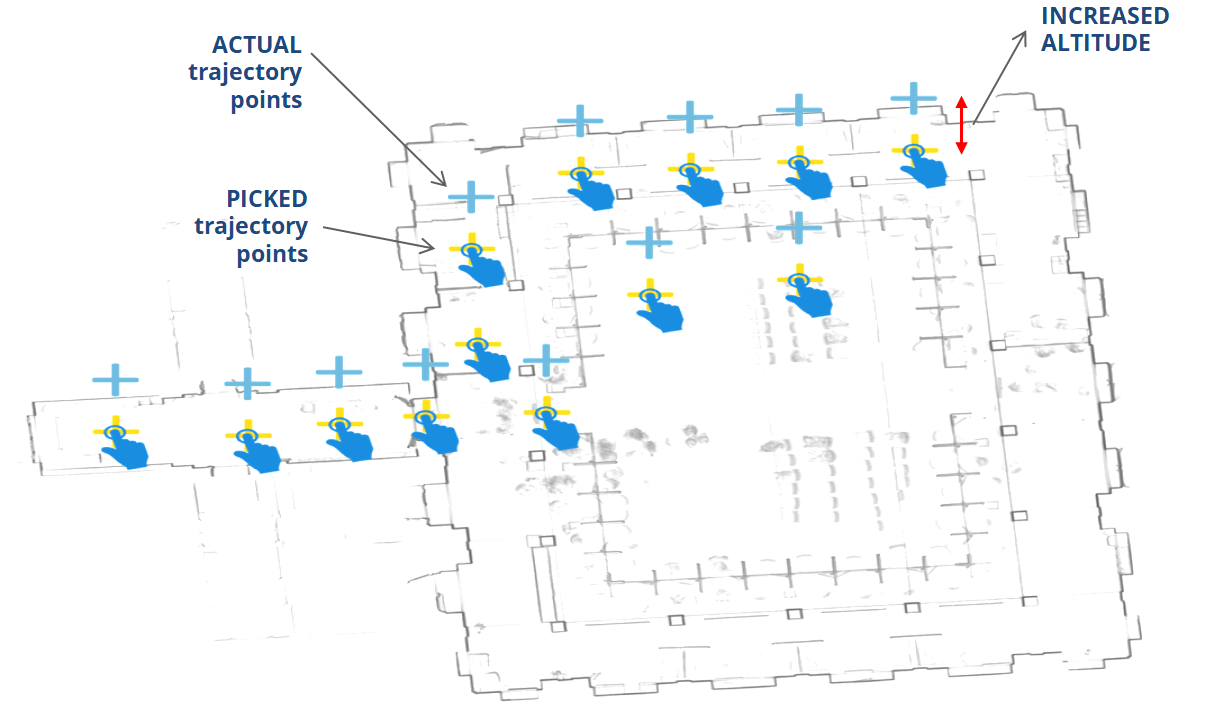
The purpose of this step is to identify a possible path that HERON® could walk down during the Tracker Live acquisition (composed by trajectory points).
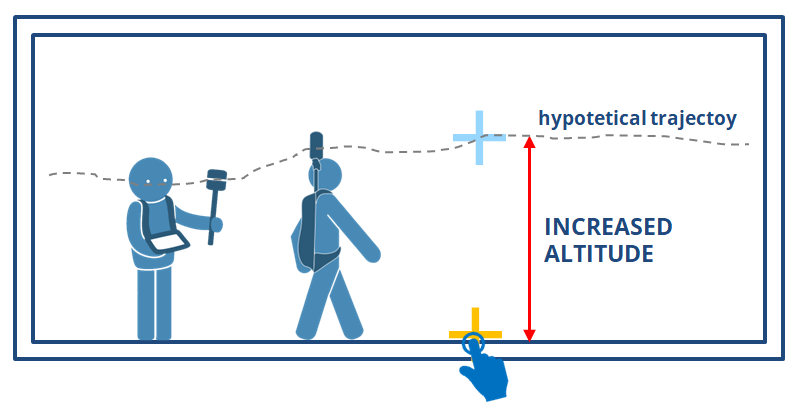
By double-clicking in the 3D scene it's possible to annotate the trajectory points on the cloud. It is warmly suggested to pick these points on the ground, but the trajectory, commonly defined by the central position of the sensor head, is not on the ground; it is so necessary to translate these points along the vertical direction.
To translate the points, flag Increase altitude of annotated point by (X meters) and select the vertical shift you want to apply to the picked point.
Then, pick the points on the floor/ground.
![]() Remember to set the altitude before picking the points.
Remember to set the altitude before picking the points.
![]() To take points on the floor you can use the Map view and set the cutting Near plane in the View Parameters in order to hide the ceiling.
To take points on the floor you can use the Map view and set the cutting Near plane in the View Parameters in order to hide the ceiling.
![]() The order of the points is not important: they can be randomly picked! It is not mandatory to follow a trajectory.
The order of the points is not important: they can be randomly picked! It is not mandatory to follow a trajectory.
If you picked a wrong point, click on the Clear last added point to delete it. More times you click on it the more points you delete.
![]() You can load both the original mesh and the extracted point cloud for an easier annotation.
You can load both the original mesh and the extracted point cloud for an easier annotation.
![]() Remember to pick points also in the narrow passages, in the corridors and on the stairs!
Remember to pick points also in the narrow passages, in the corridors and on the stairs!
![]() Before running the "Create Reference Map" command, set (create it if, you need it) a UCS in small coordinates, as for the static scans export (see Send To Heron Desktop).
Before running the "Create Reference Map" command, set (create it if, you need it) a UCS in small coordinates, as for the static scans export (see Send To Heron Desktop).
At the end click on Export to enriched PLY button. This process can take while.
During the export process you are asked to choose the color layer you want to visualize in the reference model in Heron® Desktop (RGB, Reflectance, Inclination, ...).
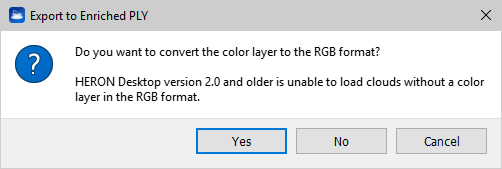
![]() If you are using Heron® Desktop version 2.0 and older, you need to care of the colorization of the exported point cloud, a warning will remind it:
If you are using Heron® Desktop version 2.0 and older, you need to care of the colorization of the exported point cloud, a warning will remind it:
The *.ply point cloud will be saved in the ...\exports\maps folder in the Heron Workspace, in order to be quickly reached during the Create Reference process.
Tips
|
To compare the survey saved during the Tracker Survey with the reference map (arisen from Reconstructor®) in post processing:
|