Zephyr registration dialog
In Reconstructor® there's a possibility to scale and georeference 3D models created in 3DF Zephyr by comparing:
- coordinates of control points taken on laser scan models in Reconstructor® and
- coordinates of homologue control points taken on pictures in 3DF Zephyr
in order to integrate different sensors outputs.
The suggested workflow is the following:
- By using Analyze -> 3D Zephyr -> Zephyr Registration Dialog in Reconstructor®, identify the control points both on scans and on couples of photos.
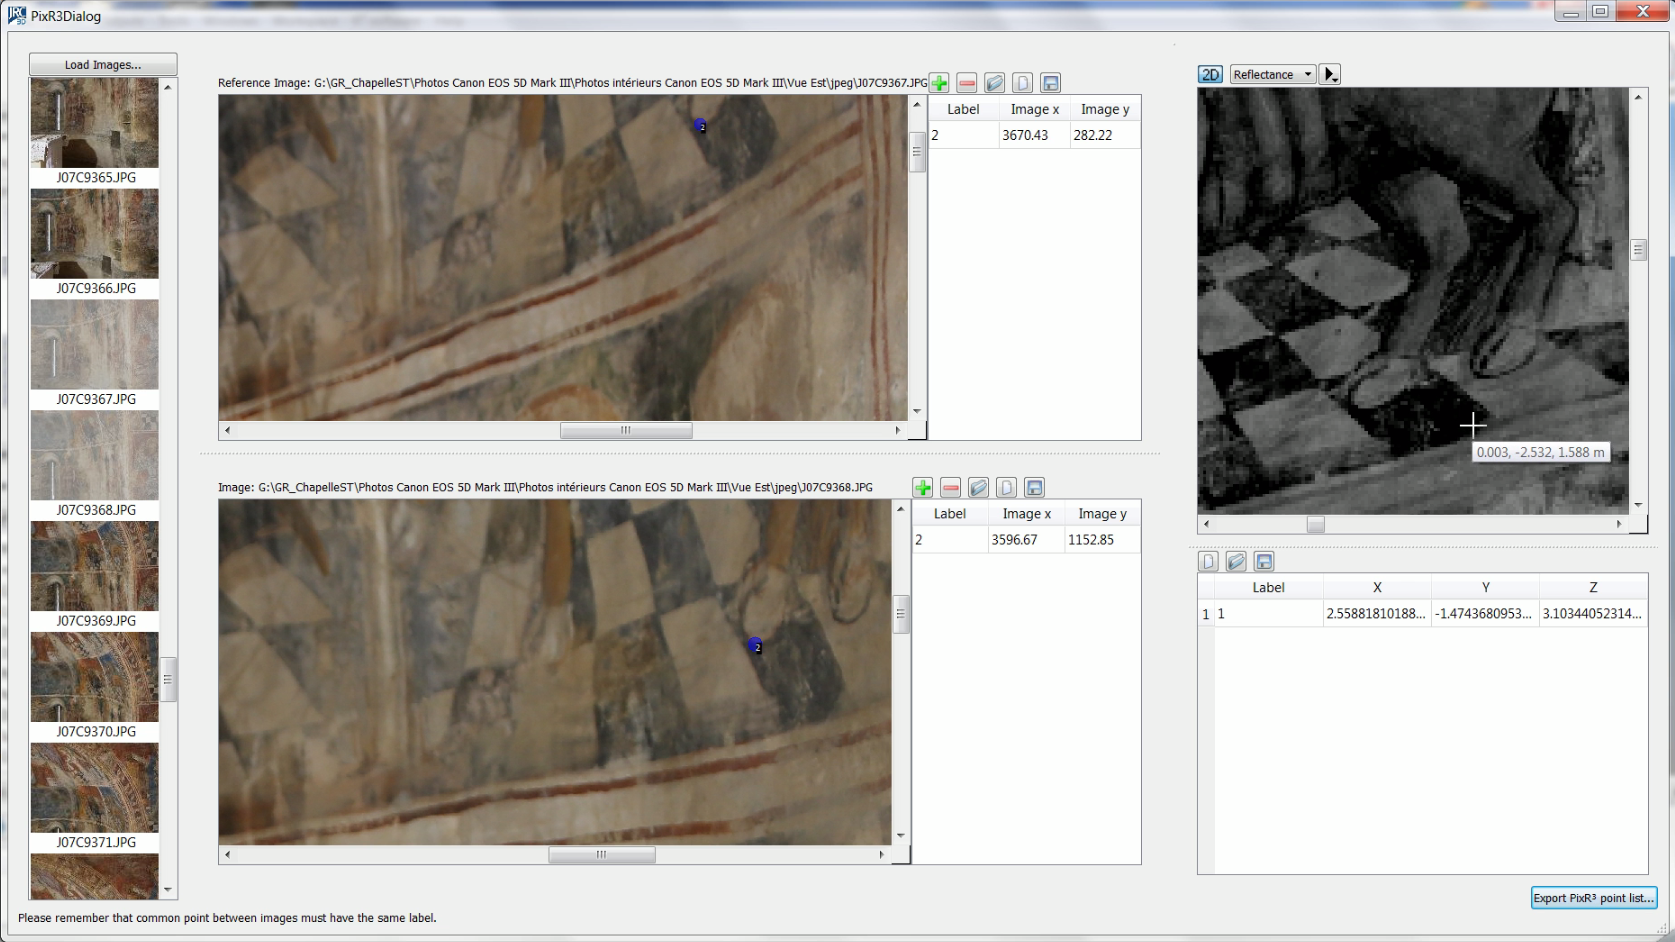
Data kindly provided by Nuage de Points SAS, Morières-Lès-Avignon (FRANCE)
- Through the Export Zephyr Point List button export the coordinates of the control points. So you can automatically obtain two .txt file, one for the 2D (on pictures) coordinates one for 3D (on scans) coordinates.
See the example, with 3 control points:
2D.txt file
|
3D.txt file
|
- Go to Zephyr environment.
- Load the control points in the Zephyr project (containing photos just used in Reconstructor®), by using the Import Control Points command and loading the 2D.txt when requested.
- Import 3D coordinates from scans, by using the Scale model with control points command and loading the 3D.txt through the Import Constraints from file button.
- Export cameras and 3D georeferenced models (point clouds and meshes, i.e. the whole project) in a .recprj project format.
- Go back to Reconstructor® environment and import the just created project.
Note: the structure of the exported (from 3DF Zephyr) project is composed by:
- Oriented cameras
- Sparse point cloud
- Dense point clouds
- Meshes
- You need to separately export/import the textured meshes
You can alternatively export/import 3D models and cameras individually.