Getting Started
The aim of this section is to suggest a simply and fast workflow to work with Reconstructor®.
|
Before to use Reconstructor® you have to install the software. After the installation the licensing permits must be verified and set. See Licensing to learn how to request and apply your license. |
|
At the opening of the software you need to Create a New project or Open an existing project (*). Each project has its own folder called with the same name. Reconstructor® projects contains at least some of the following subfolders: Documents/ Results/ Imports/ Exports/ Unstructs/ Grids/ Meshes/ Polylines/ Trash/ Images/ Movies/. These folders are automatically created when the project gets populated. |


(*) Note: For major software releases, backward compatibility of Reconstructor projects is supported; forward compatibility is not supported.
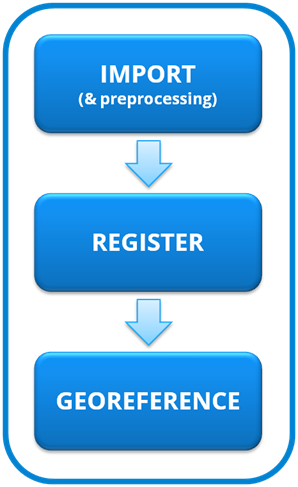
Then, starting from importing, preprocessing, registering and georeferencing steps you can navigate through point clouds editing, meshing, coloring tools until the main features extraction.
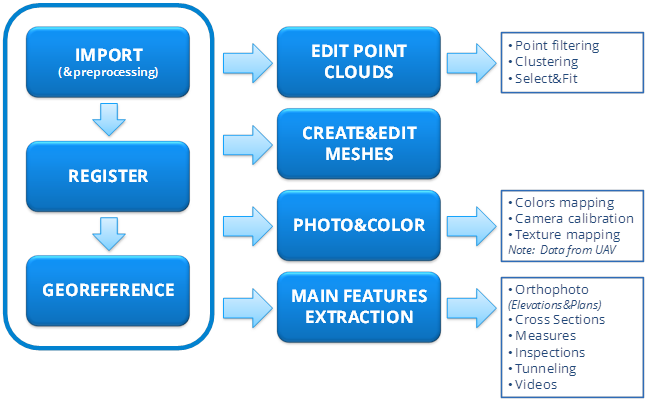
The main Workflow
|
Most of the operations in the first part of the main workflow can be performed with LineUp® toolbar commands. |

See at the below voices for all just mentioned processes:
1. Import
2. Register
3. Georeference
7. Main features extraction (analysis tools)
You can find all the Reconstructor commands in the Command Dashboard [Ctrl+D].
Reconstructor® -GEXCEL- web page