Create X-Ray Orthophoto
|
|
With this tool you can create an orthocamera from samples, points, axes, UCS directions, etc., edit it and extract an X-Ray Orthophoto. X-Ray Orthophoto can enhance important features of a 3D object such as edges, corners, walls... It emphasize points aligned in one direction of view. Only point clouds can be included in an X-Ray Orthophoto snap. |

The recipe window is splitted in two panels:
- Position
- Dimensions and corrections
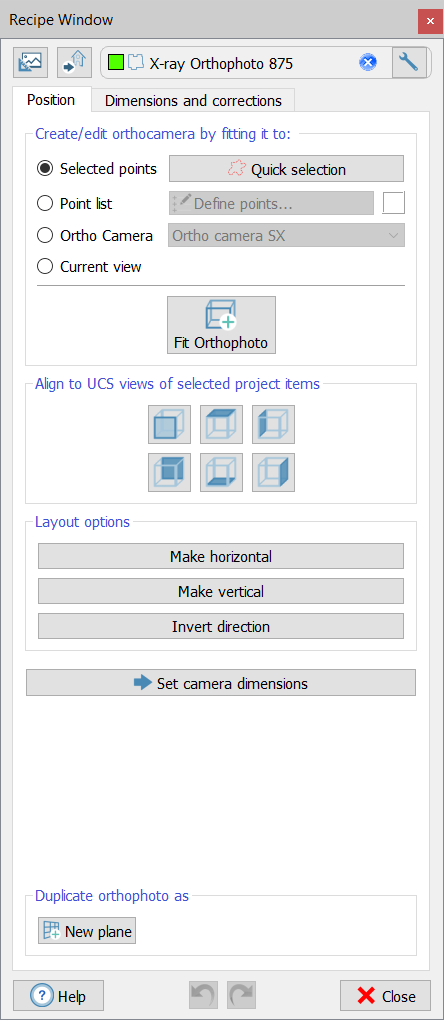
Position
|
|
First of all, press the Create new The panel of the dialog allows you to create an orthocamera from selected samples and a Quick selection (as in Selection tools) or from a Point list. By pressing Fit Orthophoto button an orthophoto is created in 3D window and in the project tree. Then it's possible to edit the camera, aligning it to UCS views, making it horizontal or vertical... At the end of this process press Set camera dimension button to switch in the Dimension and Corrections panel.
|

Dimensions and corrections
|
|
Here you can set the properties of the camera:
The position of the camera can be changed through translations and rotations in the space, as you can directly see in the 3D window. |
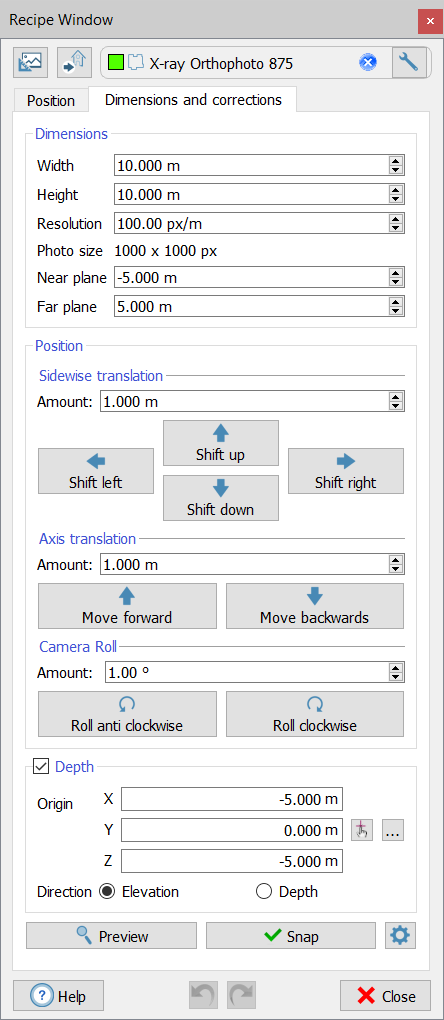
Depth
By selecting the Depth tool, the distance between a point on the orthophoto (1 point = 1 pixel) and a reference level (depth origin plane) is added in the properties of the orthophoto. The main purpose is to create a spot height map.
The difference between Depth and Elevation options lies in the sign; setting zero on the depth origin plane:
- in altitude mode, all values above the depth origin plane (e.g. between depth origin plane and projection plane) are positive and all values below are negative;
- in depth mode, all values below the depth origin plane are positive and values above are negative.
![]() X-Ray Orthophoto settings
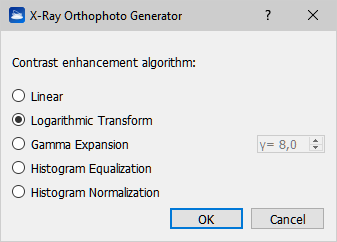
X-Ray Orthophoto settings
|
|
Select the desired contrast enhancement algorithm during the X-Ray Orthophoto generation. For the majority of cases the default (Logarithmic Transform) works well, feel free to try others too, specific for your needs. Press OK and wait a while.
|
The Preview button allows you to visualize in the 3D window a preview of the orthophoto, setting the same point of view and visualizing the loaded and checked 3D models. It helps you to find the right position of the camera, by showing you a preview of the final result.
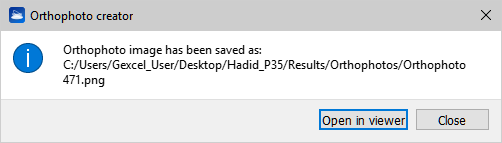
At the end of this process press Snap button to create the orthophoto then open the result in the Orthophoto Viewer pressing the Open in viewer button.
See the following videotutorial to learn how to create an X-Ray orthophoto with an example:
See also: