Masks
|
|
Masks This feature allows to interactively load and apply a mask for the HERON® sensors when obstacles (moving jointly with in the sensors) are partially occluding their view. The obstacle can create null measurements in the occluded areas (not important) but also some distortion due to echoes on the edges if close to the sensor. |

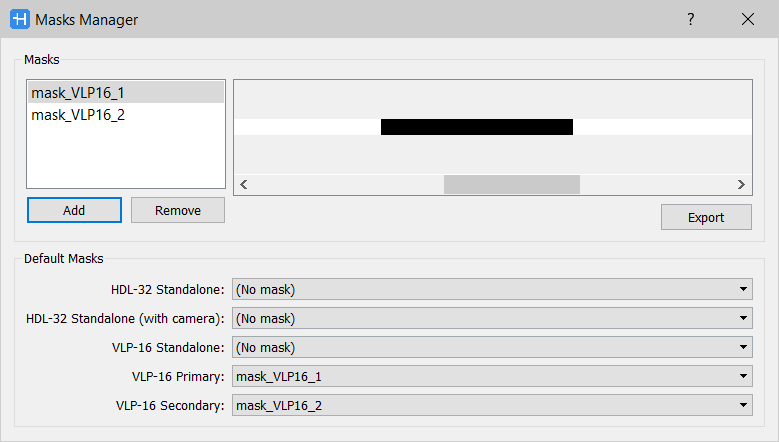
A mask is an image file created starting from the sensor lines structure, which identifies portions of the acquisition that are not considered during the processing phases.
- Click on Add to add an image file in the project.
|
|
Only *.PNG format is recognized. The added masks are valid only in the current project. |
- Click on Remove to remove a selected image file from the project.
- Click on Export to export a selected image file in third party environments.
![]() If you want to work with the individual clouds from Reconstructor®, it may be useful to know the measurements of the sensor that were invalidated by the mask.
If you want to work with the individual clouds from Reconstructor®, it may be useful to know the measurements of the sensor that were invalidated by the mask.
Default masks
Default masks are the masks applied by default when importing an acquisition in the project.
The system automatically applies the mask that correspond to each sensor.
In the standalone versions there is only one LiDAR sensor but in the dual setup there are two: a primary and a secondary one.
|
HDL-32 Standalone |
Standalone LiDAR sensor mounted on HERON AC systems |
|
HDL-32 Standalone (with camera) |
Standalone LiDAR sensor mounted on HERON AC-Color systems |
|
VLP-16 Standalone |
Standalone LiDAR sensor mounted on HERON LITE systems |
|
VLP-16 Primary |
HORIZONTAL LiDAR sensor mounted on HERON MS Twin systems |
|
VLP-16 Secondary |
TILTED LiDAR sensor mounted on HERON MS Twin systems |
Create a new mask
You can create a mask on purpose. It is useful, for example, when using the car mount to remove occlusion due to the vehicle.
Here below the steps to create and apply a new mask.
- Select an acquisition and open the
 view from the Information section
The range map visualizer will appear, displaying he sensor view in Distance or Reflectance colorization. - Move the time cursor in order to find a view that better help you to detect the area you want to remove by the mask.
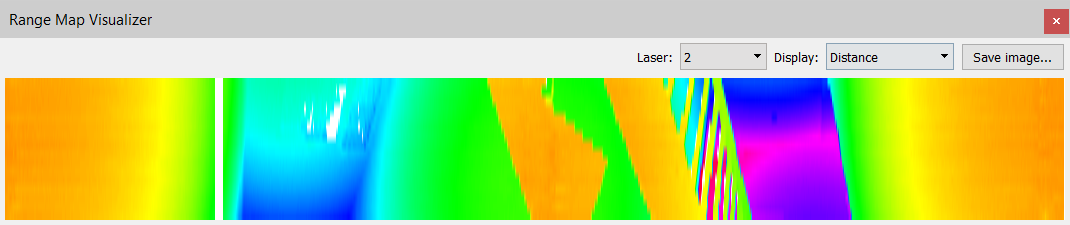
- Click on Save image... button to save a .png file of the sensor view.
Do the same thing for each sensor of your HERON system, if you have more than one. - Edit the image in a photo editing software by coloring in black (R=0, G=0, B=0) the area to be masked and in white (R=255, G=255, B=255) the rest.
|
Here an example of the saved image and the extracted mask
|
![]() The images cannot be modified into this tool, a third photo editing software is necessary.
The images cannot be modified into this tool, a third photo editing software is necessary.