Create/edit UCS
|
|
The command is available in the UCS & positioning Top Toolbar tool. |

|
|
The Create/edit UCS command allows you to create a new UCS (by pressing
|
Fitting Methods
Six methods are available to create and modify an UCS.
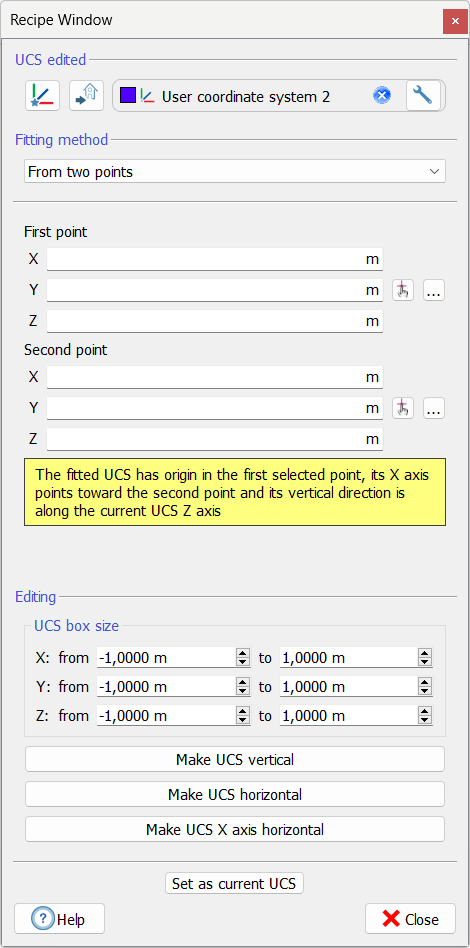
From two points
The UCS is here defined by setting 2 points in the 3D space:
- UCS origin
- a point on the X axis
![]() The fitted UCS has origin in the first selected point, its X axis points towards the second point and its vertical direction is along the current UCS Z axis.
The fitted UCS has origin in the first selected point, its X axis points towards the second point and its vertical direction is along the current UCS Z axis.
These points can be selected directly by double clicking on the 3D scene, chosen between the Points listed in the project or identified by manually entering their coordinates.
From three points
The UCS is here defined by setting 3 points in the 3D space:
- UCS origin
- a point on the X (or Y axis)
- a point on XY plane
These points can be selected directly by double clicking on the 3D scene, chosen between the Points listed in the project or identified by manually entering their coordinates.
At the end of the process it is possible to invert the Z direction.
From Current view
The UCS is adapted to current view, with the origin in the point of view's origin, the Z axis oriented towards your eye and X, Y axes parallel to the 3D window edges.
Fit UCS to faces
The UCS is here created by selecting portions of the point clouds to define both the UCS's XY plane (horizontal) and the UCS's XZ plane (side).
To do it the lasso command is used to select the points on a "flat" [suggested] surface.
![]() This method is particularly useful when you have to create an UCS whose planes are parallel to the floor and walls, in order to extract orthophoto, cross sections, ....
This method is particularly useful when you have to create an UCS whose planes are parallel to the floor and walls, in order to extract orthophoto, cross sections, ....
Check that your points sample is large enough so you don't make any serious mistakes.
From an item's pose
The UCS of the desired item is cloned. Drag&Drop the item in the dialog or double click on it in the 3D scene.
From points registration
The UCS is created from two sets of points.
See Create UCS from point list.
Editing
|
|
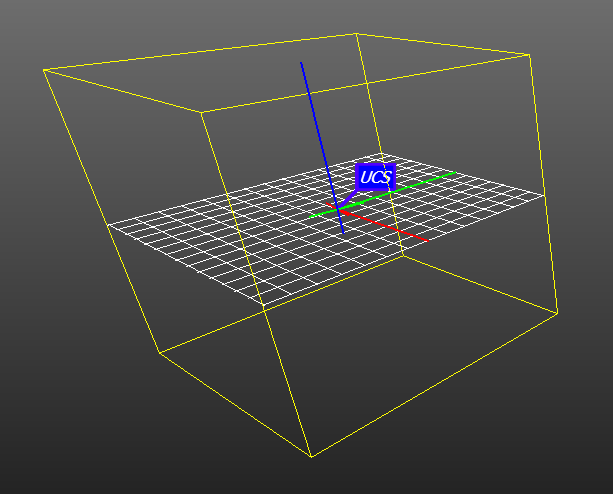
By default the UCS's bounding box dimensions are set between -1 m and +1m, in all the 3 main directions (X,Y, and Z), but you can easily set different values, in order to make more visible the UCS at large distances, for example. |
By clicking the buttons below, you can
- Make UCS vertical, setting its Z axis parallel to the Z axis the current UCS
- Make UCS horizontal, setting its XY plane parallel to the XY plane of the current UCS
- Make UCS X axis horizontal, setting the horizontality of the only X axis.
At the end you can choose to set the just created/modified UCS as current in the project, by pressing the Set as current UCS button.