Project Window
All the item are listed in the Project Window.
|
|
This window provides a tree view of the current project items. The Project window lists the items present in the project, organized in a tree structure, where each data type is grouped in a separate folder.
Note: the |
|
|
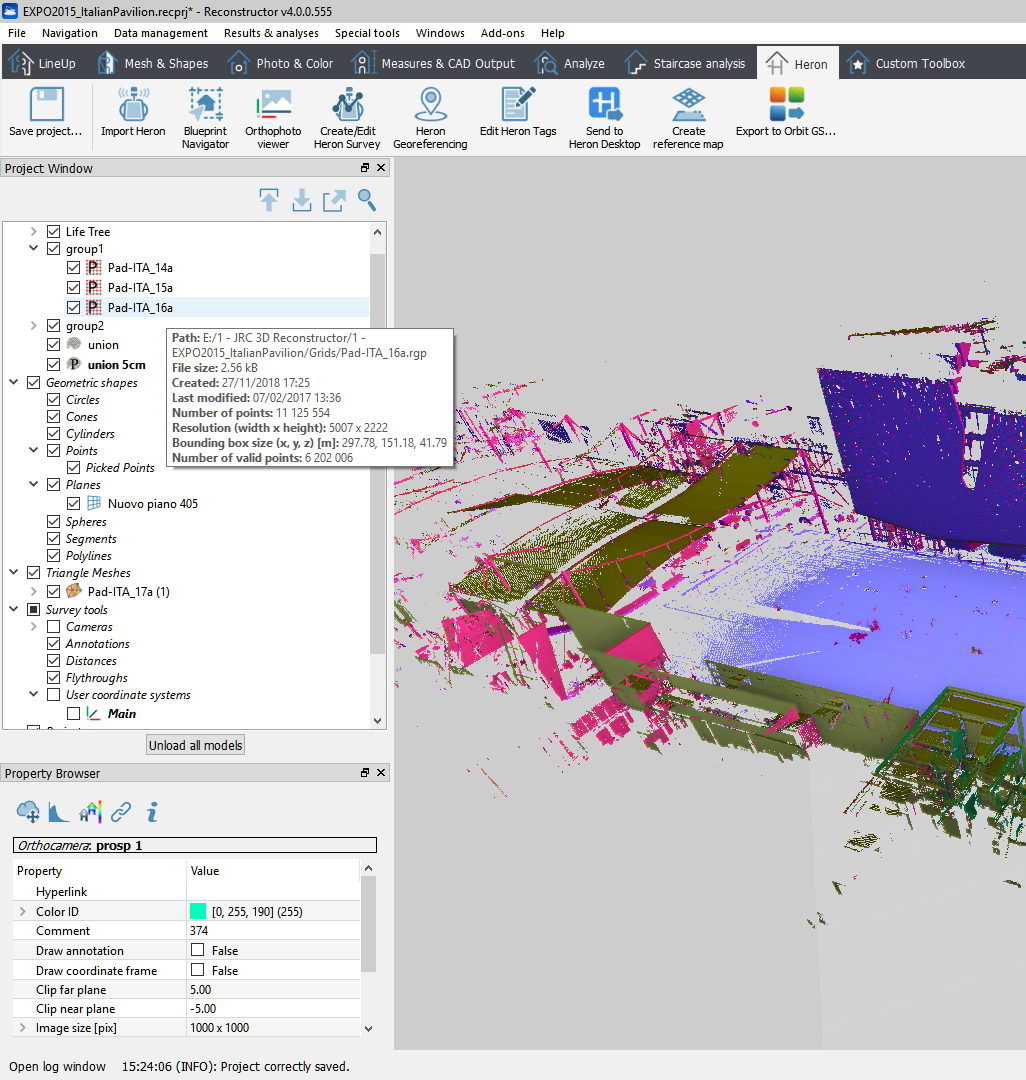
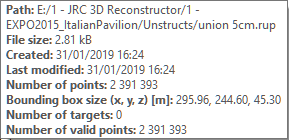
By hovering the mouse over the item name, a tool tip pop ups with some information about the item, like file path, file size, etc.
|
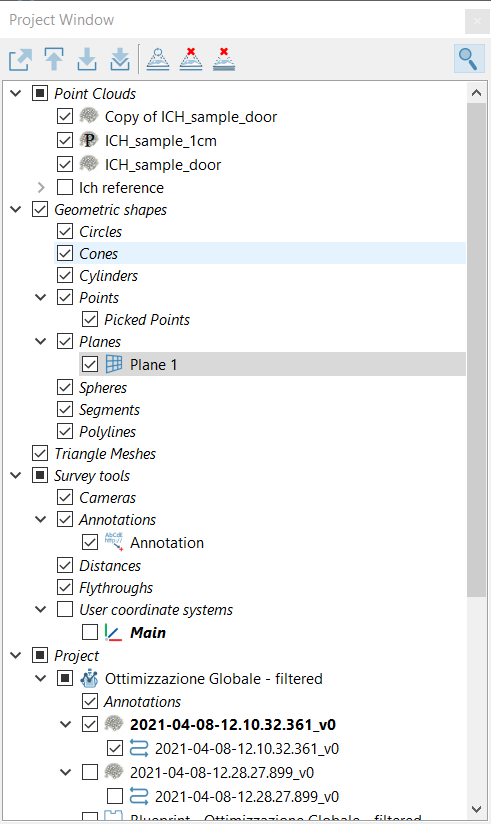

To enable the rendering of an item, click the checkbox  on the left of the item. The checkbox of a folder enables/disables all its sub-items.
Uncheck-check process permits you to load a model.
Items such as point clouds or triangle meshes are models. Models can be loaded or unloaded; loaded models are listed in bold in the project window.
|
|
Load model Selecting a model (cloud of points or mesh) from the project window tree and pressing this button, the model will be loaded in PC RAM and if it is also checked |
|
|
Unload model It unloads from the RAM and from the main window the selected item(s). |
|
|
Unload all models It unloads from the RAM and from the main window all the models (point clouds and meshes). |
|
|
Load projector It loads (light on) the image of a projector on the 3D model. |
|
|
Unload projector It unloads the image of a projector from the 3D model. |
|
|
Unload all projectors It uunloads from the RAM an from the main window all the projectors. |
|
|
Search project item It searches through the items of the project. |


Furthermore, by right-clicking on an item in the project window, a context menu is displayed where only the commands that apply to the given item type are shown. Commands can therefore also be issued from that context menu: this is useful in particular to load/unload a model, to set an hyperlink to an item or to open the hyperlink, to move the item to another group in the project.
![]() Each item has properties that can be viewed and edited in the Property window when the item is highlighted.
Each item has properties that can be viewed and edited in the Property window when the item is highlighted.
To rename a model, right-click on it and select rename. To rename all other items, double click on the item's name and edit the name.
If an item needs to be saved it appears in red color or red bold color if loaded.
![]() To remove one or more items from the current project, select the item(s) in the Project window and select Remove from the contextual menu or press CANC key. The files are not lost, they are simply moved to the project's Trash folder inside the project directory, so they can be recovered (cut away from the trash to an other project folder and Load item... from the File menu).
To remove one or more items from the current project, select the item(s) in the Project window and select Remove from the contextual menu or press CANC key. The files are not lost, they are simply moved to the project's Trash folder inside the project directory, so they can be recovered (cut away from the trash to an other project folder and Load item... from the File menu).
A specific behaviour is dedicated to removing groups or group's items (see more details at Groups entry).
Multi-selection of items is possible by using [Shift] and [Ctrl] keys. Then it’s possible to:
- delete the selection with CANC key
- set the common properties in the Property window
- open the context menu (right click on the selection) to display the commands that are applicable to the selection.
Quick model distinction can be made by pressing the “Color by ID”  button on the Project window toolbar. Each model is colored by its color ID set in the Properties window. This color is randomly computed when the model is inserted in the project. See Screen settings.
See also dockable windows, and project items.