Manual Picking Control Points Workflow - Using Targets
A comprehensive workflow from a well prepared pre-survey planning to data post processing in the office, as targets will be prepared and placed at the GCPs location. Then, during the survey, targets will be acquired by HERON® portable mobile mapping system.
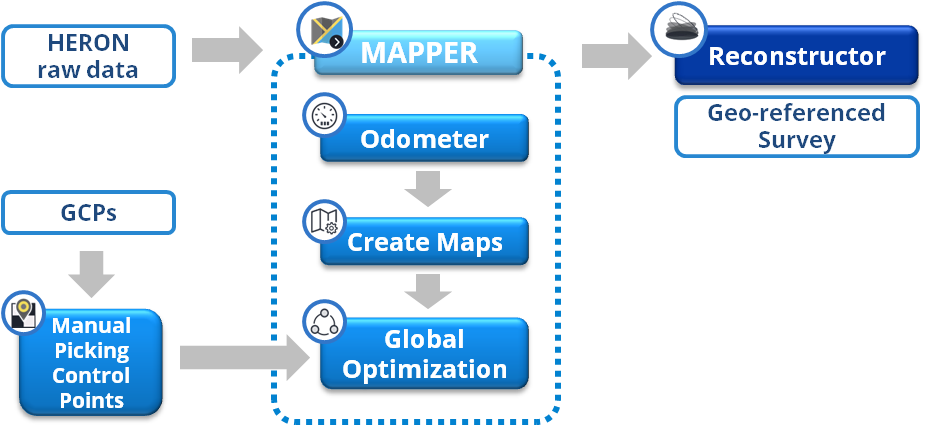
Post processing HERON® data will be done with all the steps in the standard workflow from Odometer, Create Maps, and Global Optimization.
Targets acquired by HERON® on the point clouds will be integrated with their coordinates acquired by RTK, GNSS or Total station with very high level of accuracy and processed with HERON® data in Global Optimization process in order to:
- Optimize the global accuracy of HERON® data
- and to georeference the HERON® Data in post processing process in HERON Desktop.
For this workflow, pre-survey planning is the important key to success. At each control point location, black and white target should be placed.
|
|
|
|
Possible targets can be used |
|


During the survey with HERON®, it’s recommended to acquire a tag point or annotation (add tag/quick tag/pole tag tools on the system during a survey) close to the target area so that when doing the post processing raw Heron data in HERON Desktop, those targets can be easily found.
So, in HERON Desktop, the function can be found right here when accessing to the HERON® project: Manual Picking Points function to use targets as constraint to the HERON® data.
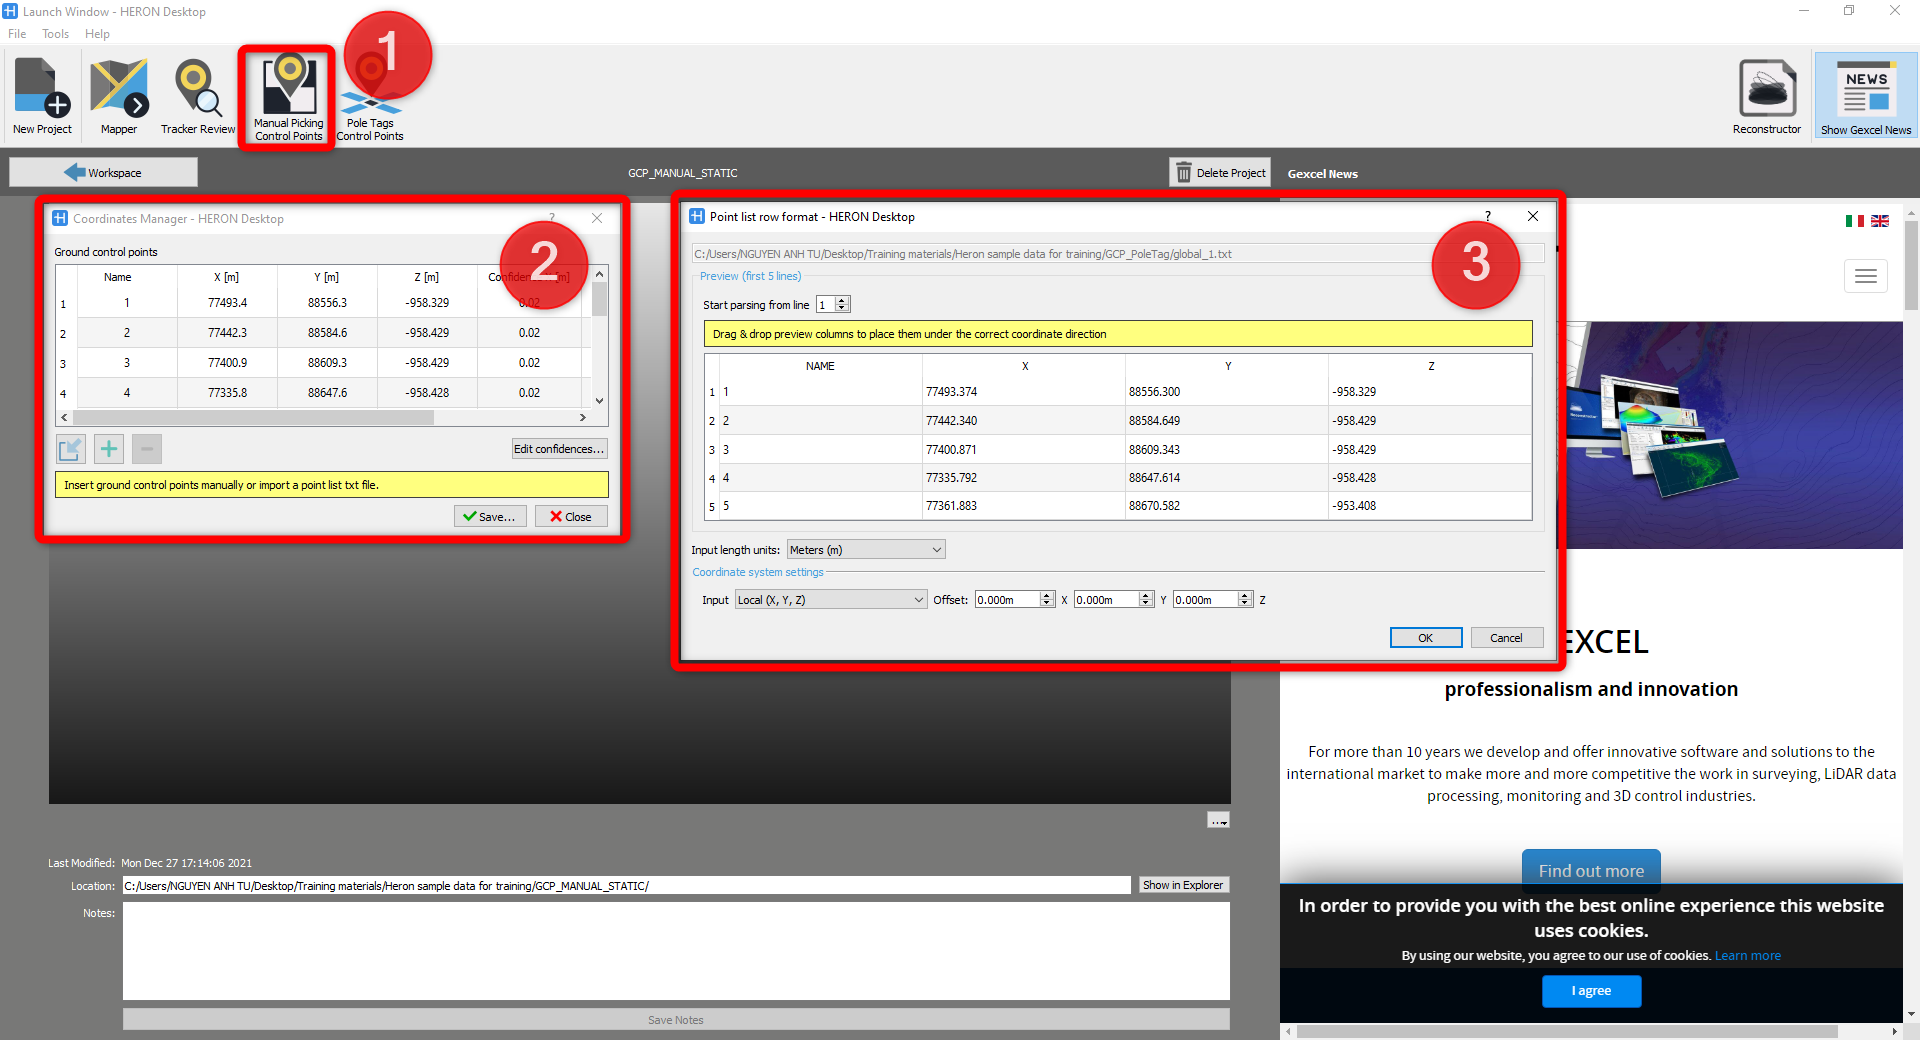
Click on the button, and at this step you only need to import the list of control points. The confidence values of control points should be modified as the instrument specifications in order to ensure the optimized results, then save this calibration file for the next step.
Going to Mapper to continue with all the usual workflow Odometer > Create maps > Global Optimization.
Global Optimization is the step where we integrate the imported control points with targets acquired by HERON®.
![]() As mentioned before, the route of the survey should be planned in advance. Target locations should be wisely arranged along the trajectory and around the survey area.
As mentioned before, the route of the survey should be planned in advance. Target locations should be wisely arranged along the trajectory and around the survey area.
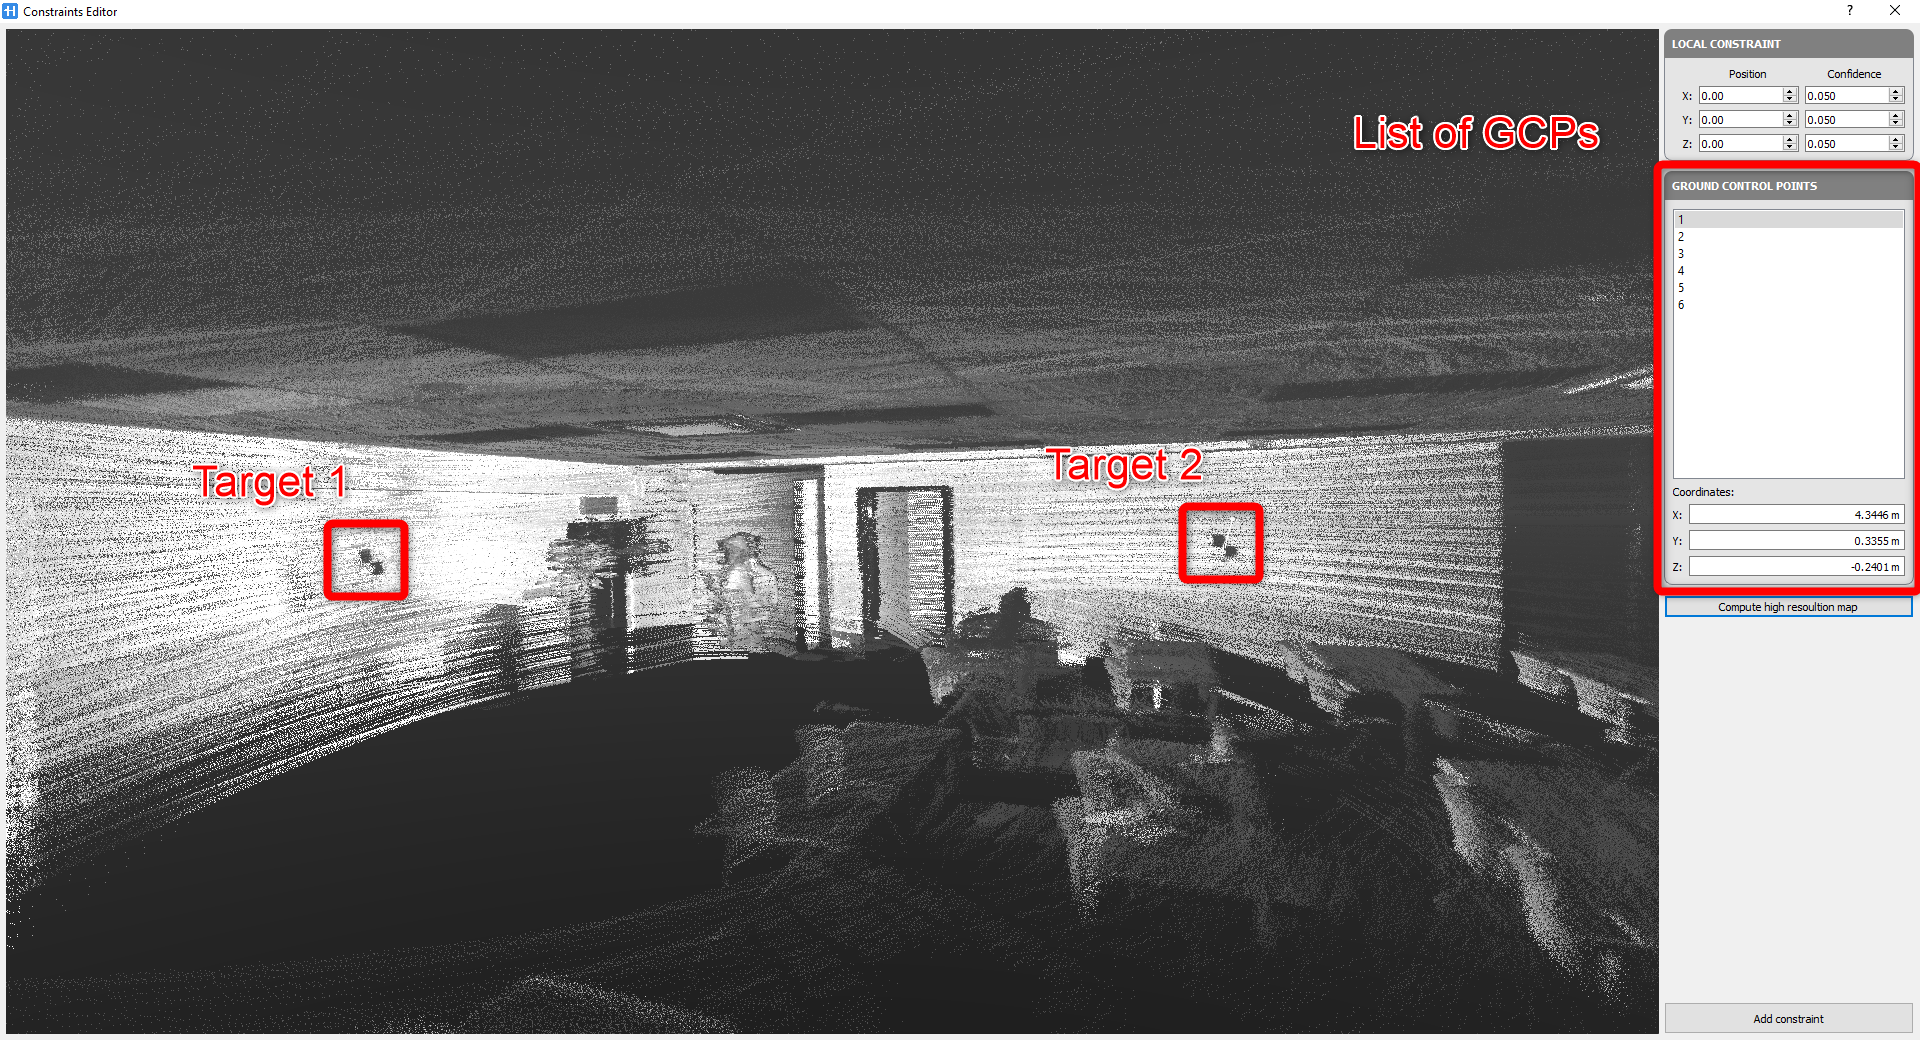
In the Global Optimization select the Local map where its point cloud should include target.
Click on Add button in Constraint tab, then on Re-compute high resolution map.
After finding and picking the target, select the corresponding control points.
We need at least 3 matches between Targets and corresponding control points. Of course, the more matches we have, the better results we will get.
After running the Optimize Cluster process, go back to check the error of all matches.
These errors are the relative errors between picked points and external points. They can be reduced by re-picking the target points from the point cloud. 2cm of errors are a reasonable value because of the local accuracy of the laser sensor.
After all done, the survey is ready to be exported in Reconstructor®.
Follow the step-by-step video tutorial to learn how to run the Manual Picking Points workflow.