Pole tags Control Points Workflow
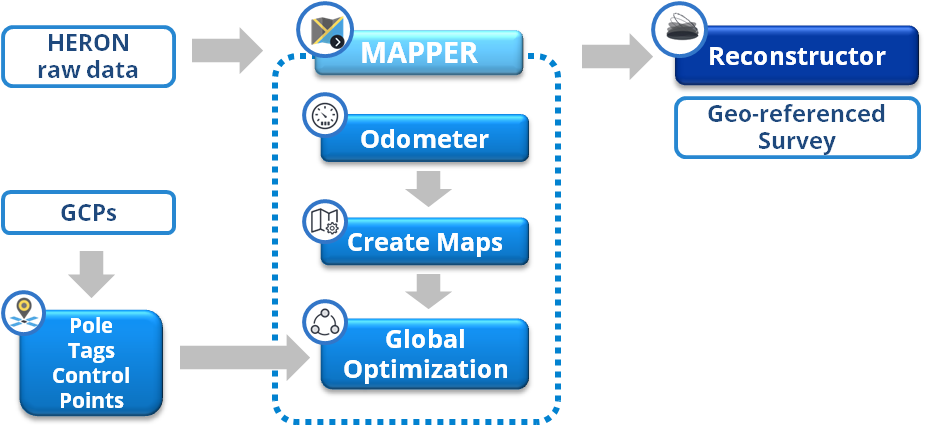
A comprehensive workflow from a well prepared pre-survey planning to data post processing in the office is schematize in the following image.
On field, during the survey, the GCPs are acquired by HERON® using the Pole Tag functionality in HERON® Live; find here the Tutorial Video for Pole tags Control Points available!
This tool allows to collect the position of the ground control point in HERON® reference system.
Back in the office: Processed the acquired HERON® data along the odometer, create maps, and global optimization steps, save the Global Optimization by pressing accept  , close the Mapper and go back to launch window.
|
|
In the launch window click the Pole Tags Control Points button and access to the Coordinate Manager window. The window splits into 2 main parts, on the left where HERON® reference points are imported and listed, the right is for importing GCP list. |

![]() Notice that for any Heron Desktop project, to achieve the best results, it is highly recommended first to process the trajectory processing along the the odometer, create maps, and global optimization steps and then do introduce the GPS as described here below.
Notice that for any Heron Desktop project, to achieve the best results, it is highly recommended first to process the trajectory processing along the the odometer, create maps, and global optimization steps and then do introduce the GPS as described here below.
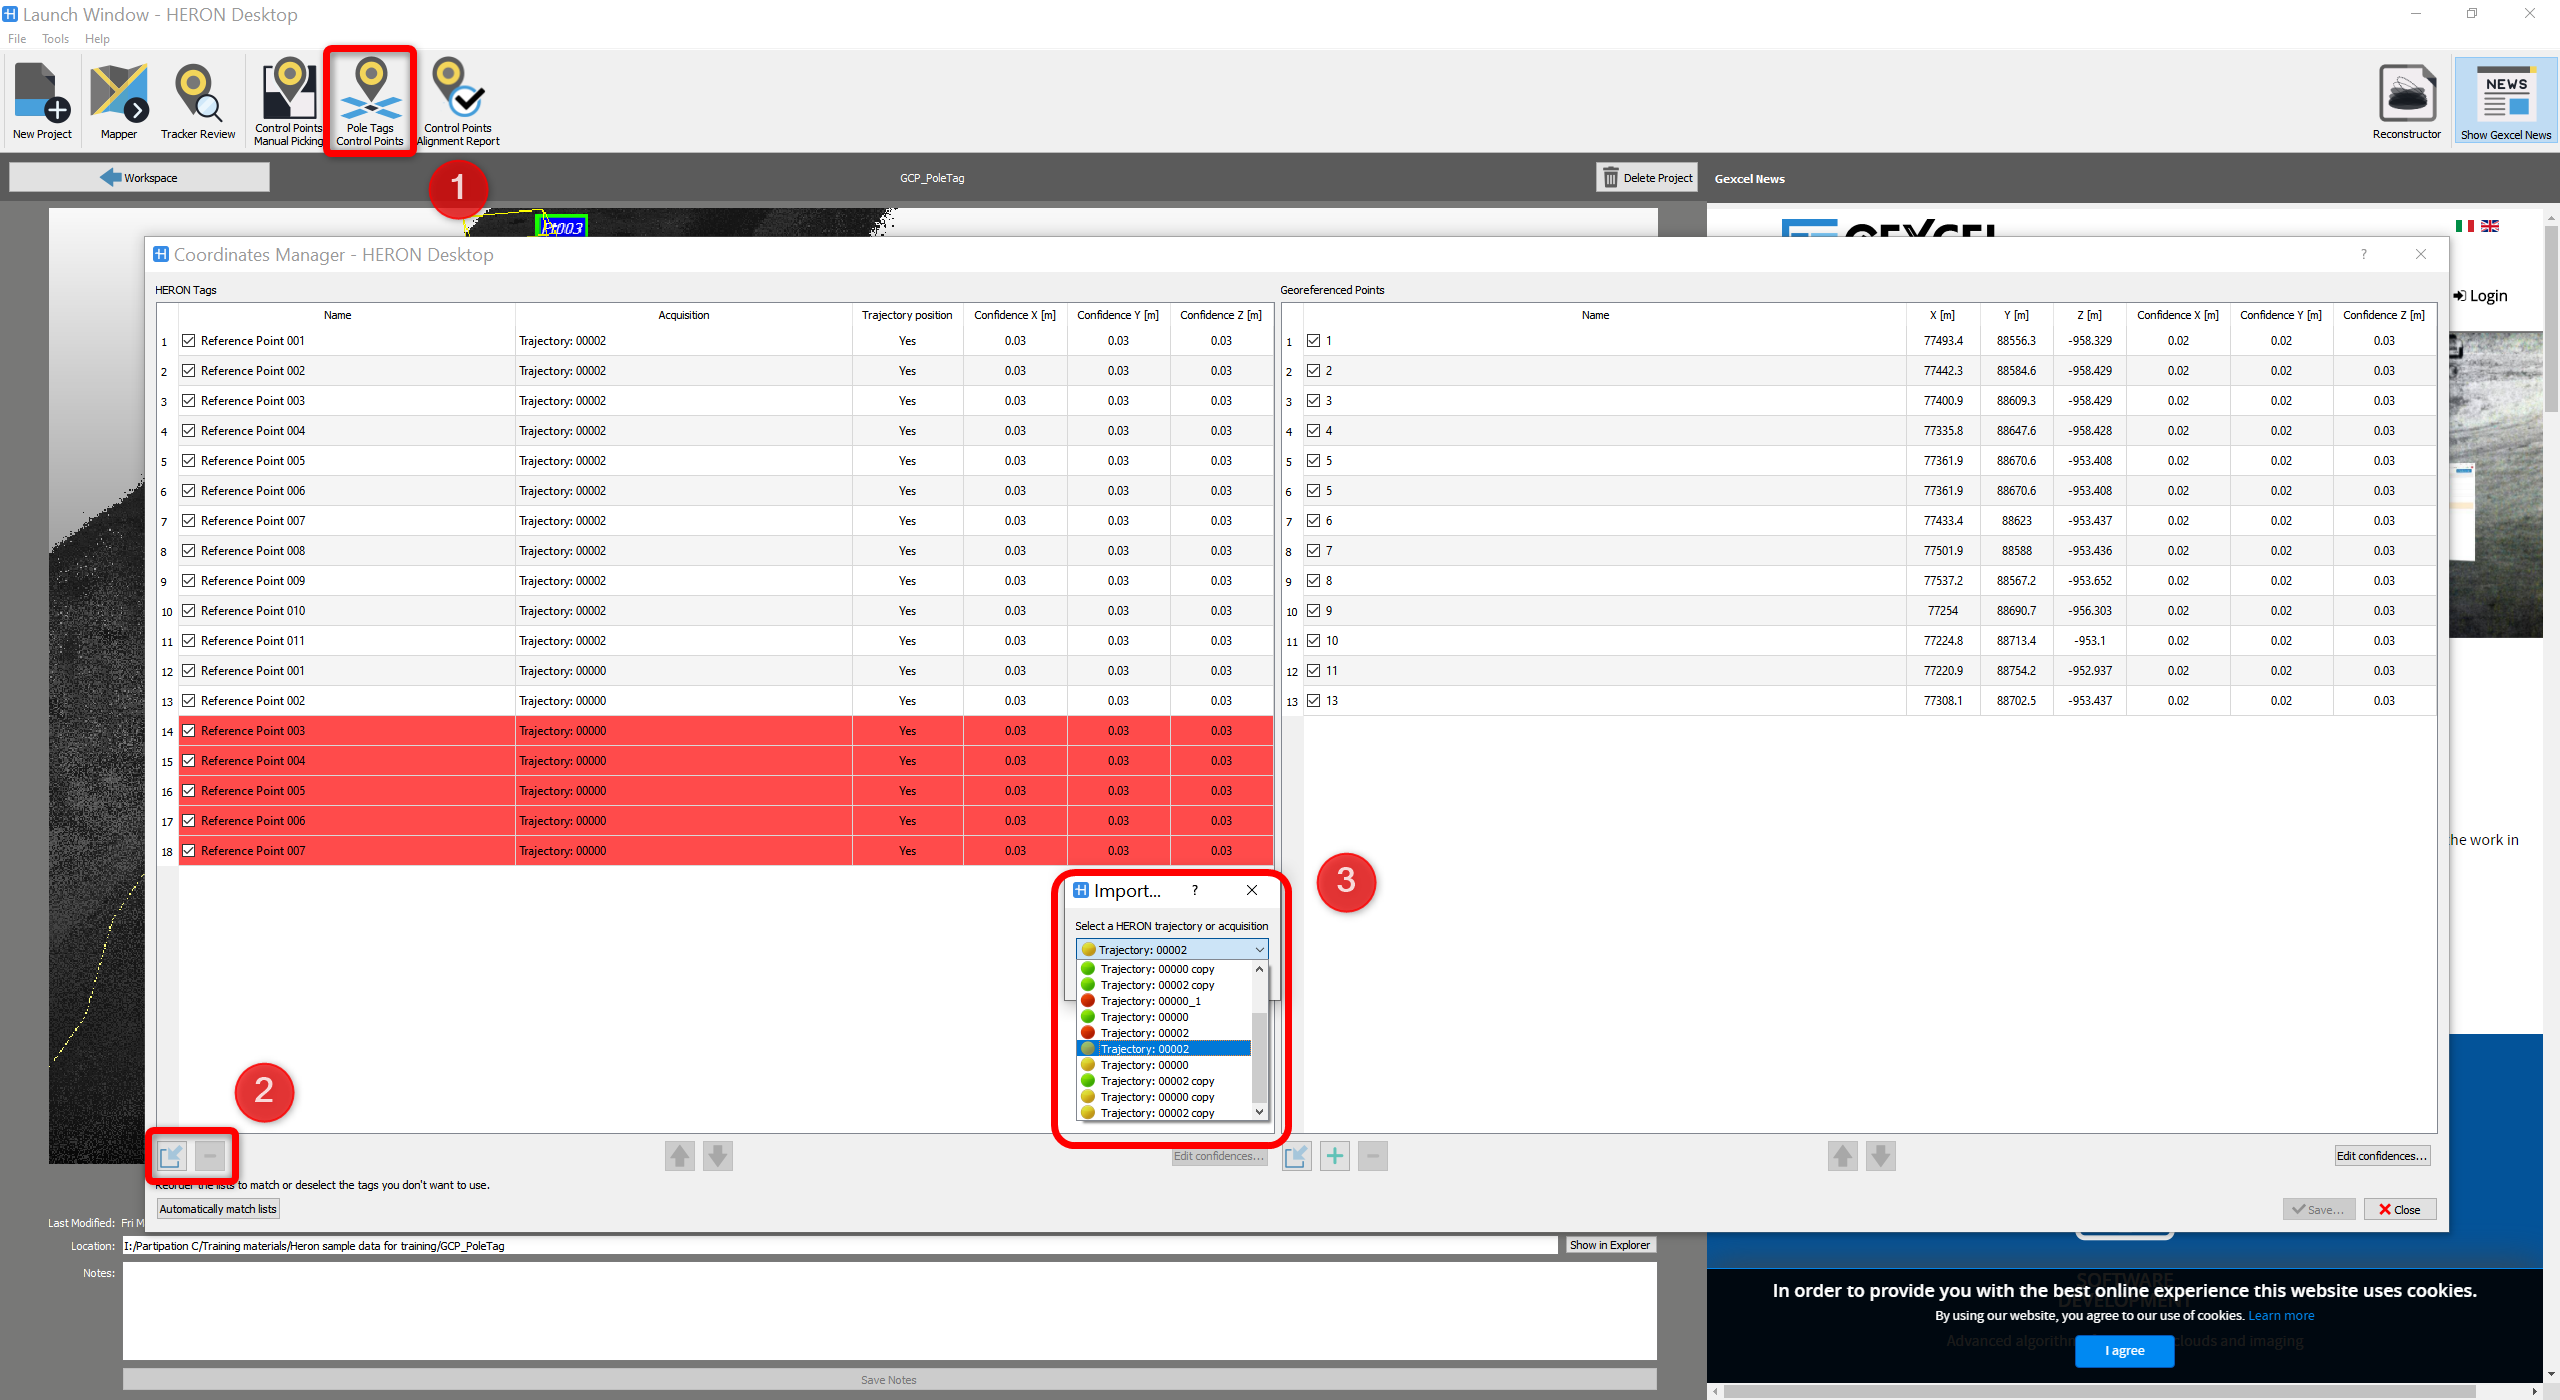
The Pole Tags Control Points function can be easily found on the main toolbar, top right, at ➊. As soon as Coordinate Manager window is open, at ➋, click on the button, each processed HERON® trajectory of the project can be selected from the drop-down list at ➌; choose the trajectory Output of a global optimization
 .
.
and the reference points (points acquired by Pole tags function during the survey) are listed in the HERON tags side. If more trajectories are available, repeat this operation. All the Pole tags related to a specific trajectory are listed and the reference trajectory is specified.
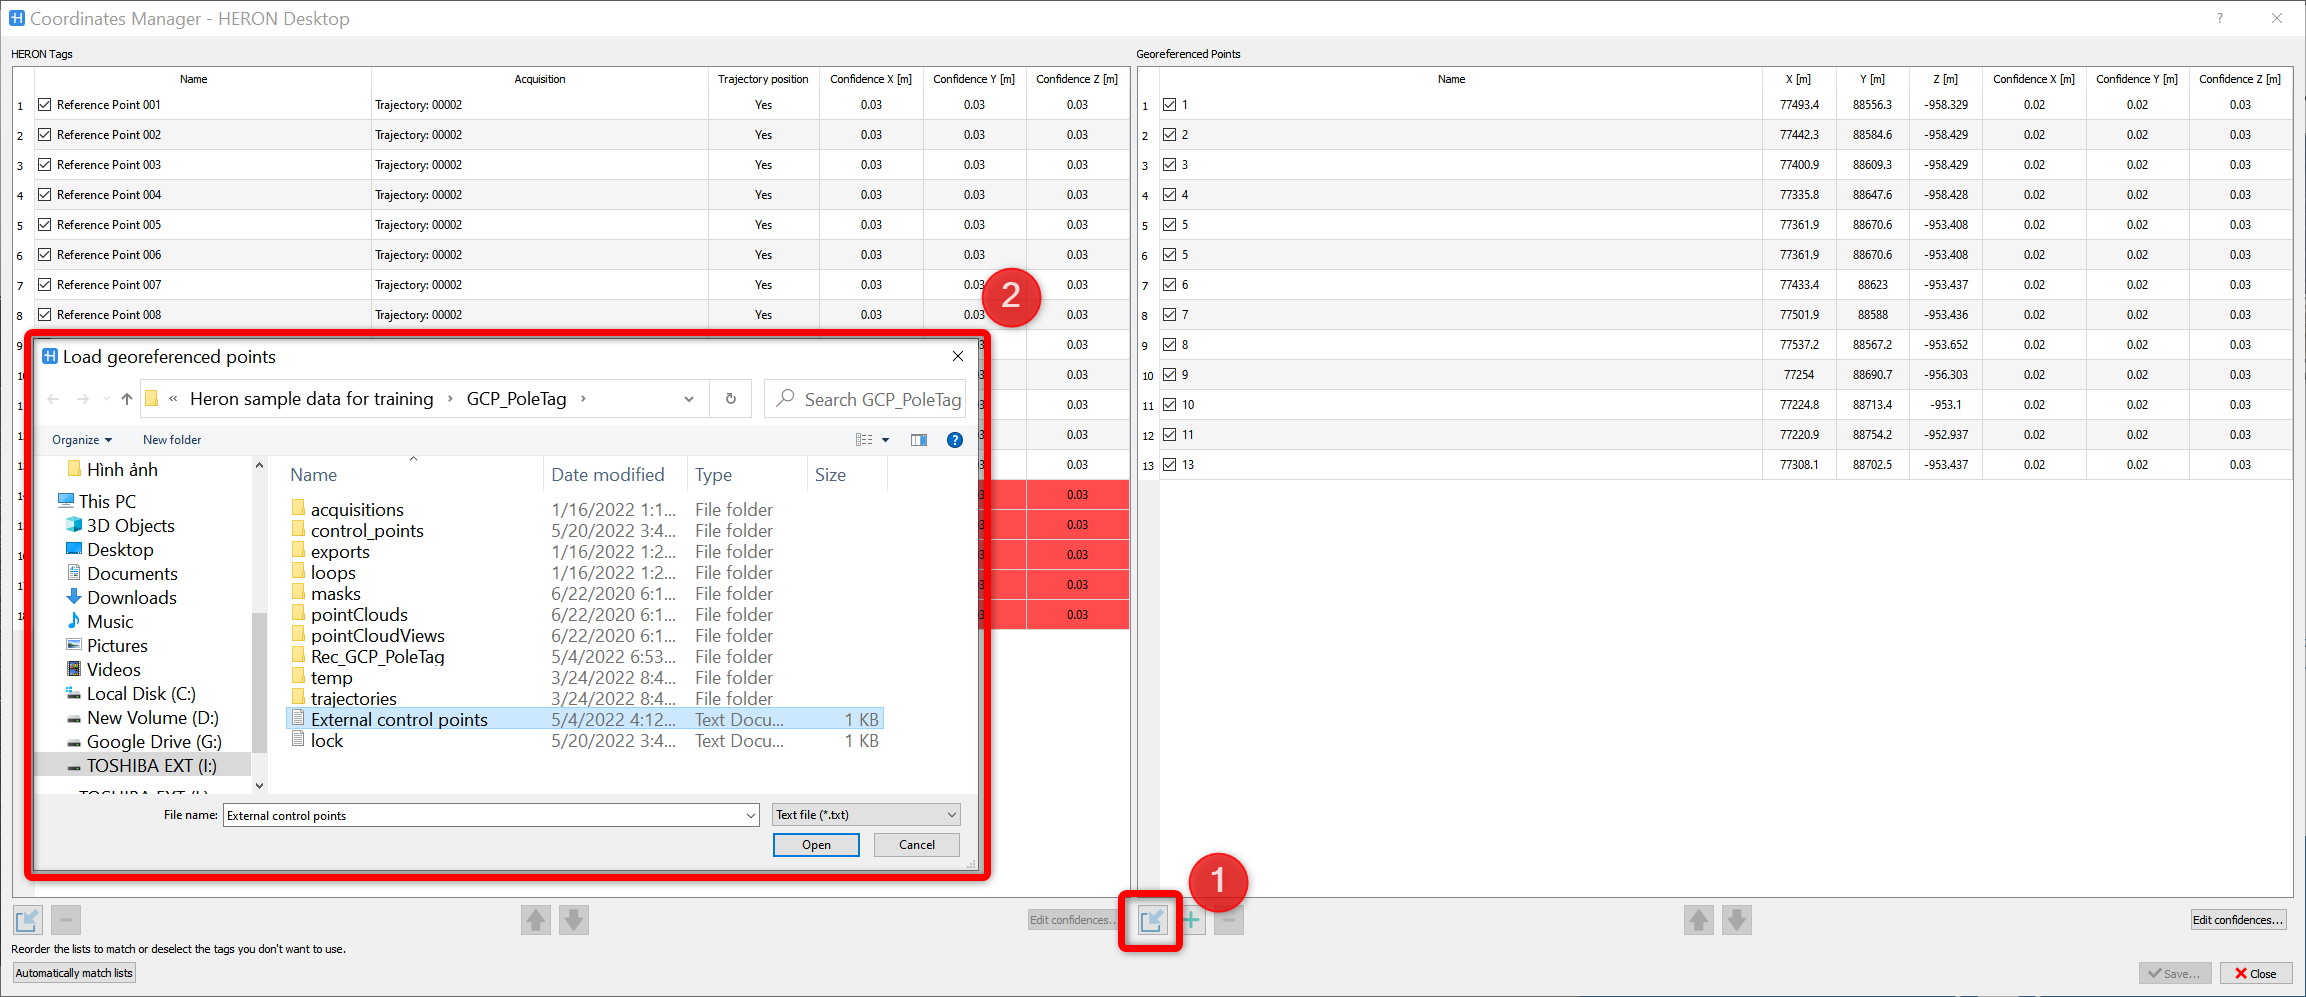
To import external control points click the button ➊ at the bottom left of the Geo-referenced Points window, as shown in the image below. Choose then select the point list file. All the external control points will be imported and listed on the Georeferenced points window.
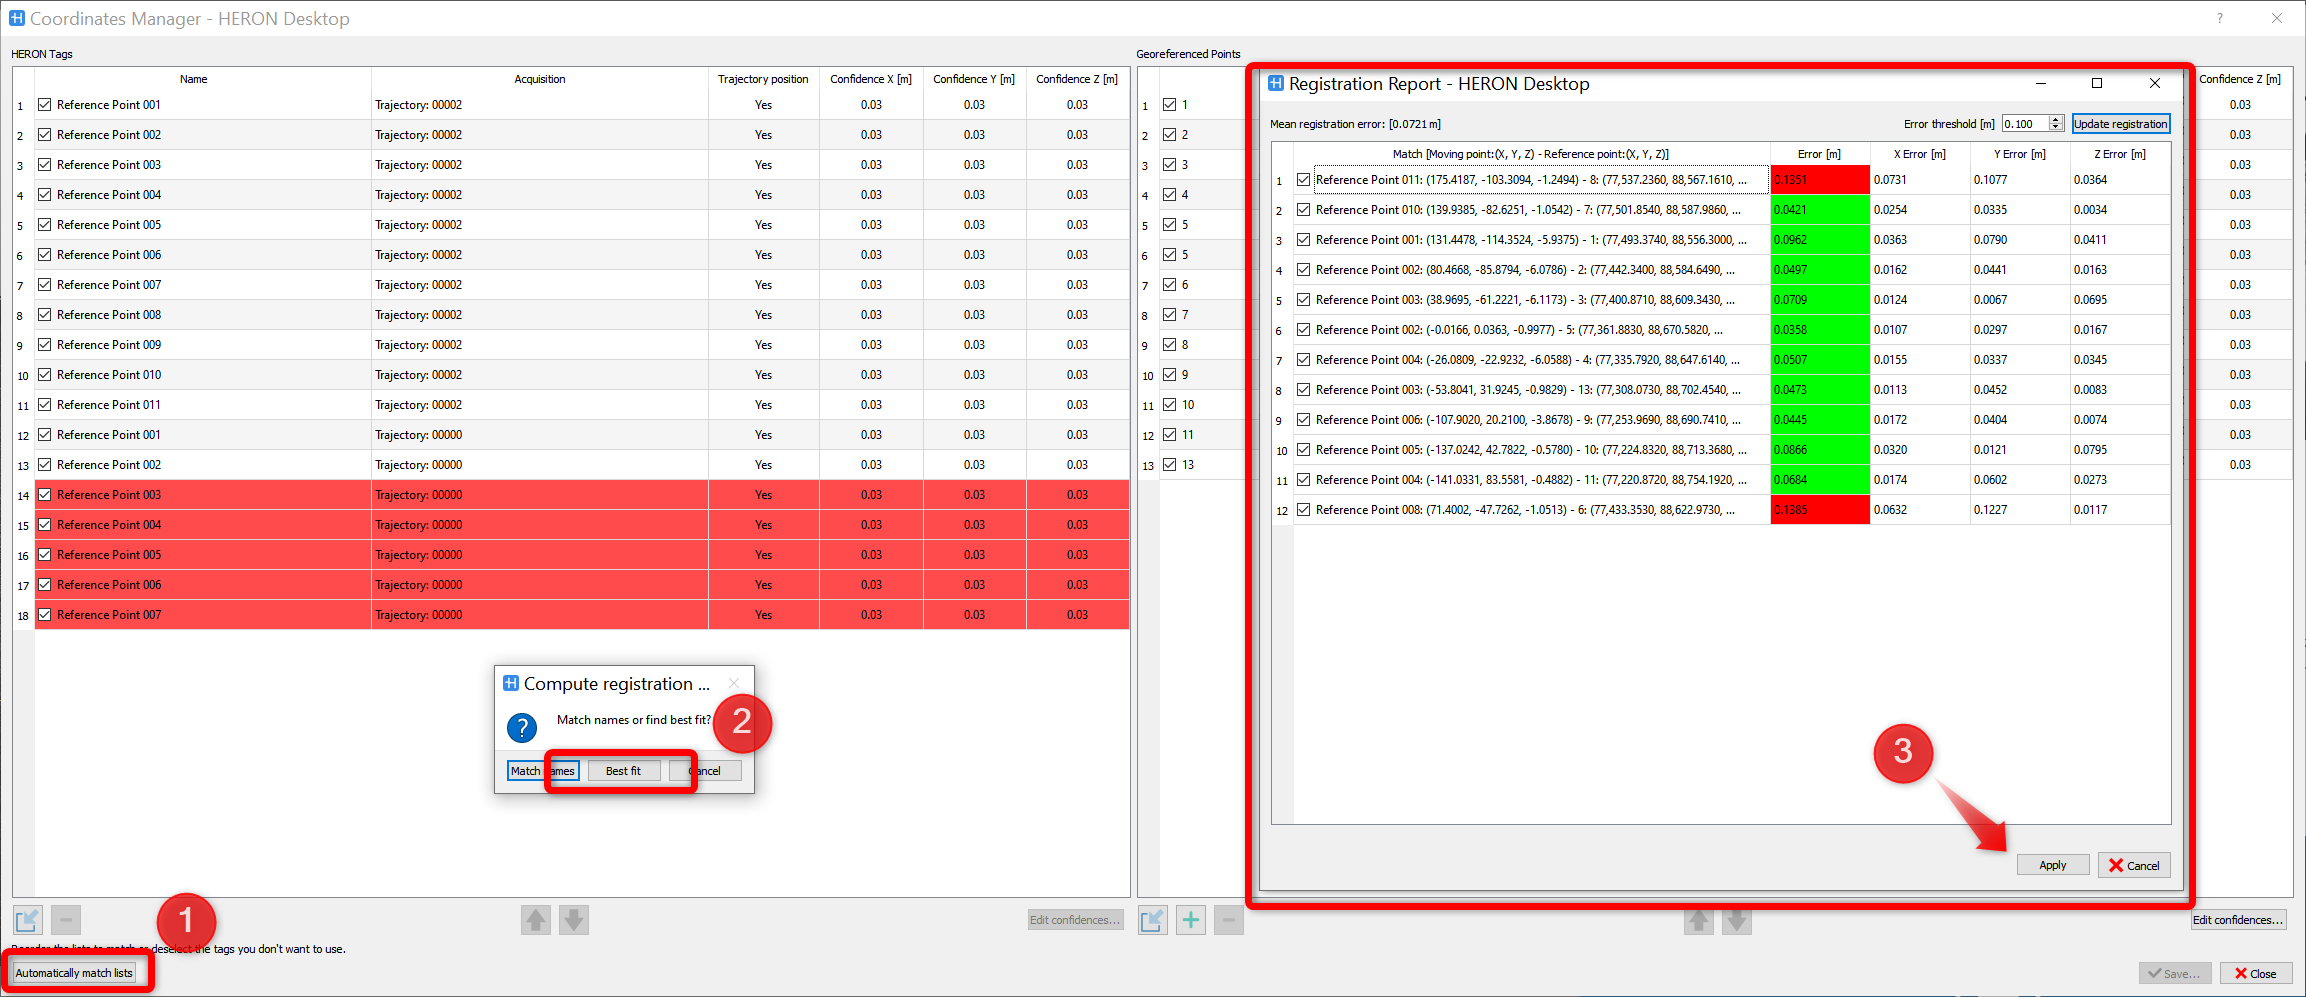
After having all the Pole tags points (in HERON local coordinates system) and the external control points (in global coordinate system) listed in the Coordinates Manager window, click on Automatically match lists button. Choose the Best fit to automatically match the two list. A registration report will pop-up showing the initially estimated relative errors between 2 point lists; the next Global optimization process aims to minimize this initial matching error.
Click on Apply button to accept the result.
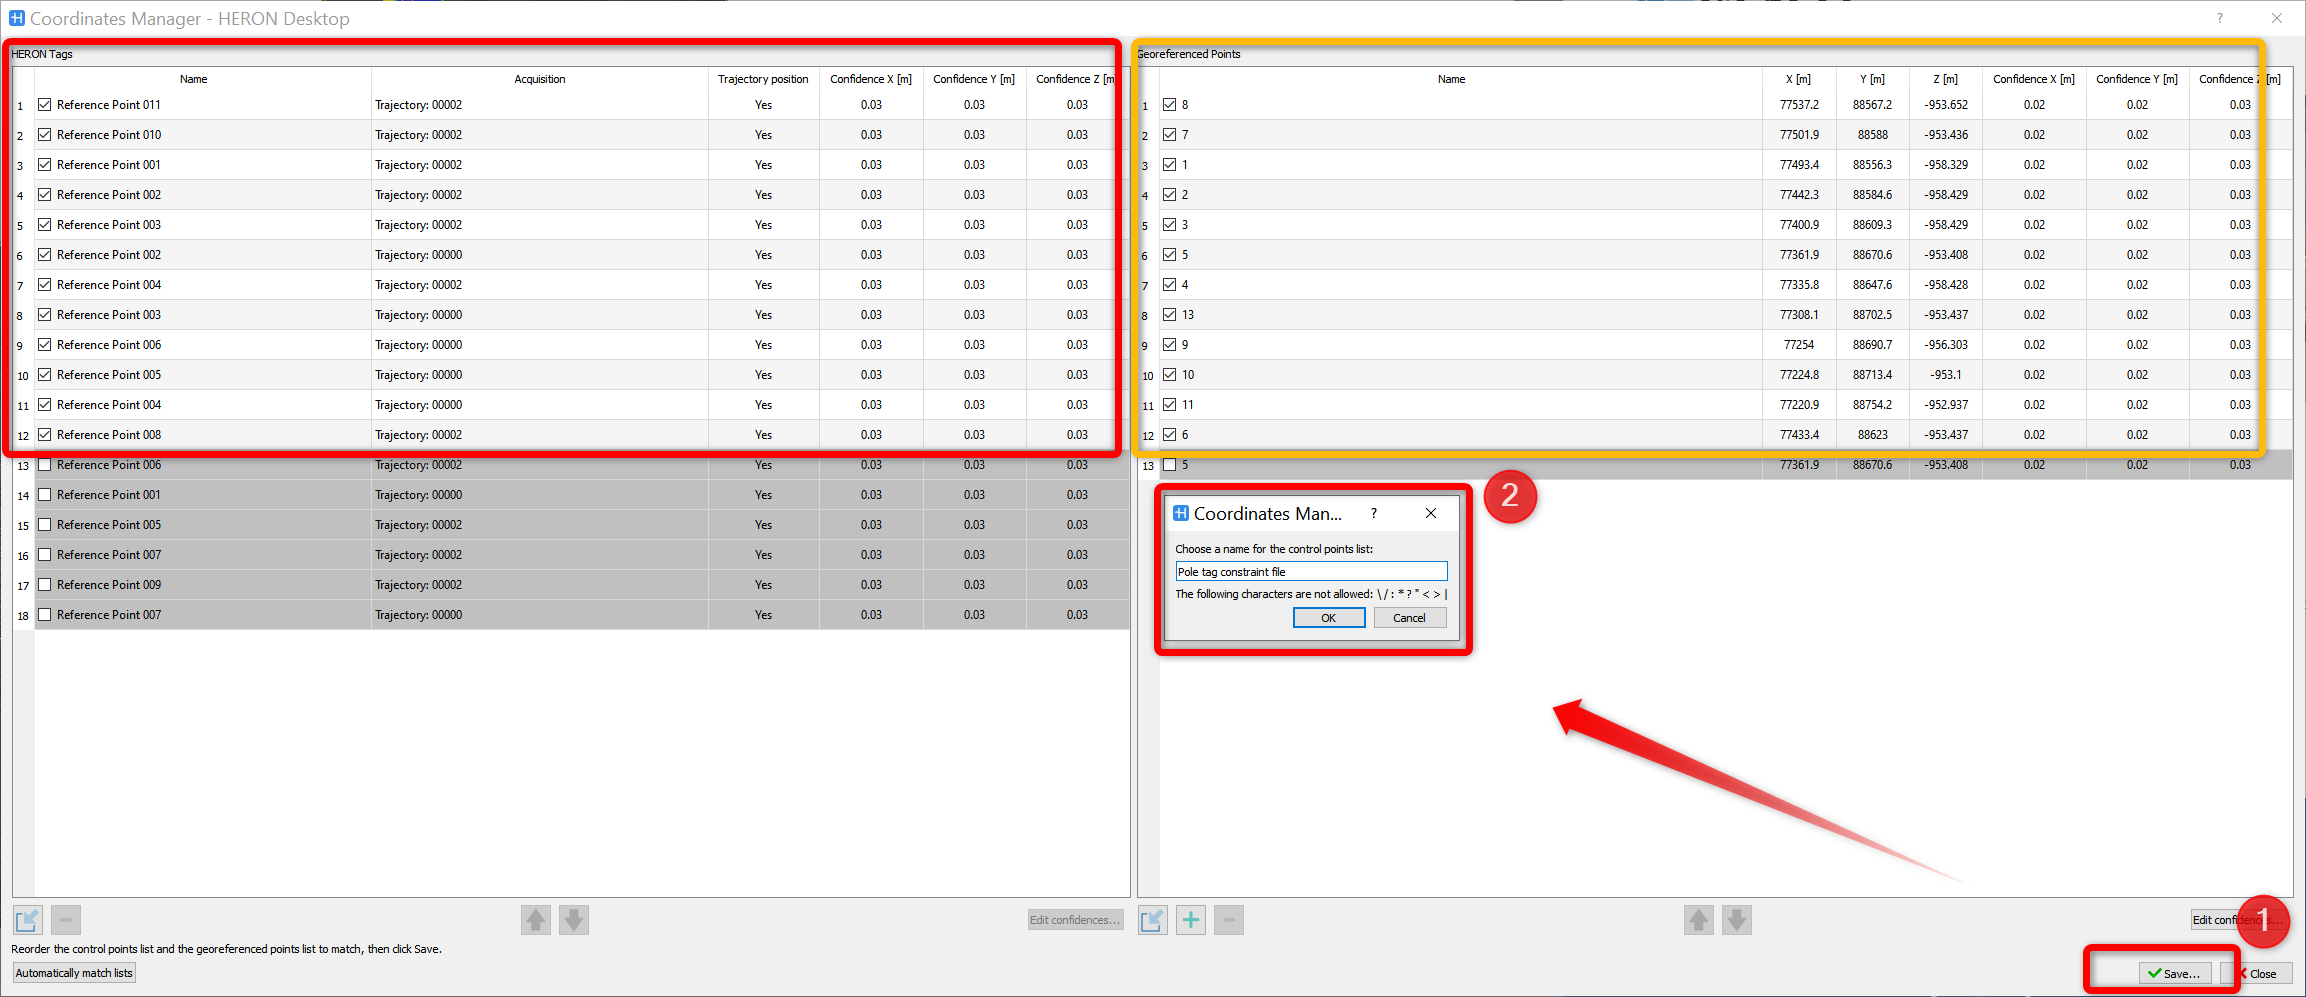
The final table, as shown in the image below, list the the pole tags points and external control points in the correct order; if the two list of points (HERON and reference) are unpaired, the points that do not match are unflagged, Save the points constraint file in a txt file. The file is automatically save in a folder with the same name, please remember the name for the next Global Optimization step.
Now press the Mapper option  to go back to the global optimization from which the pole tag has been imported. Enter in the global Global Optimization.
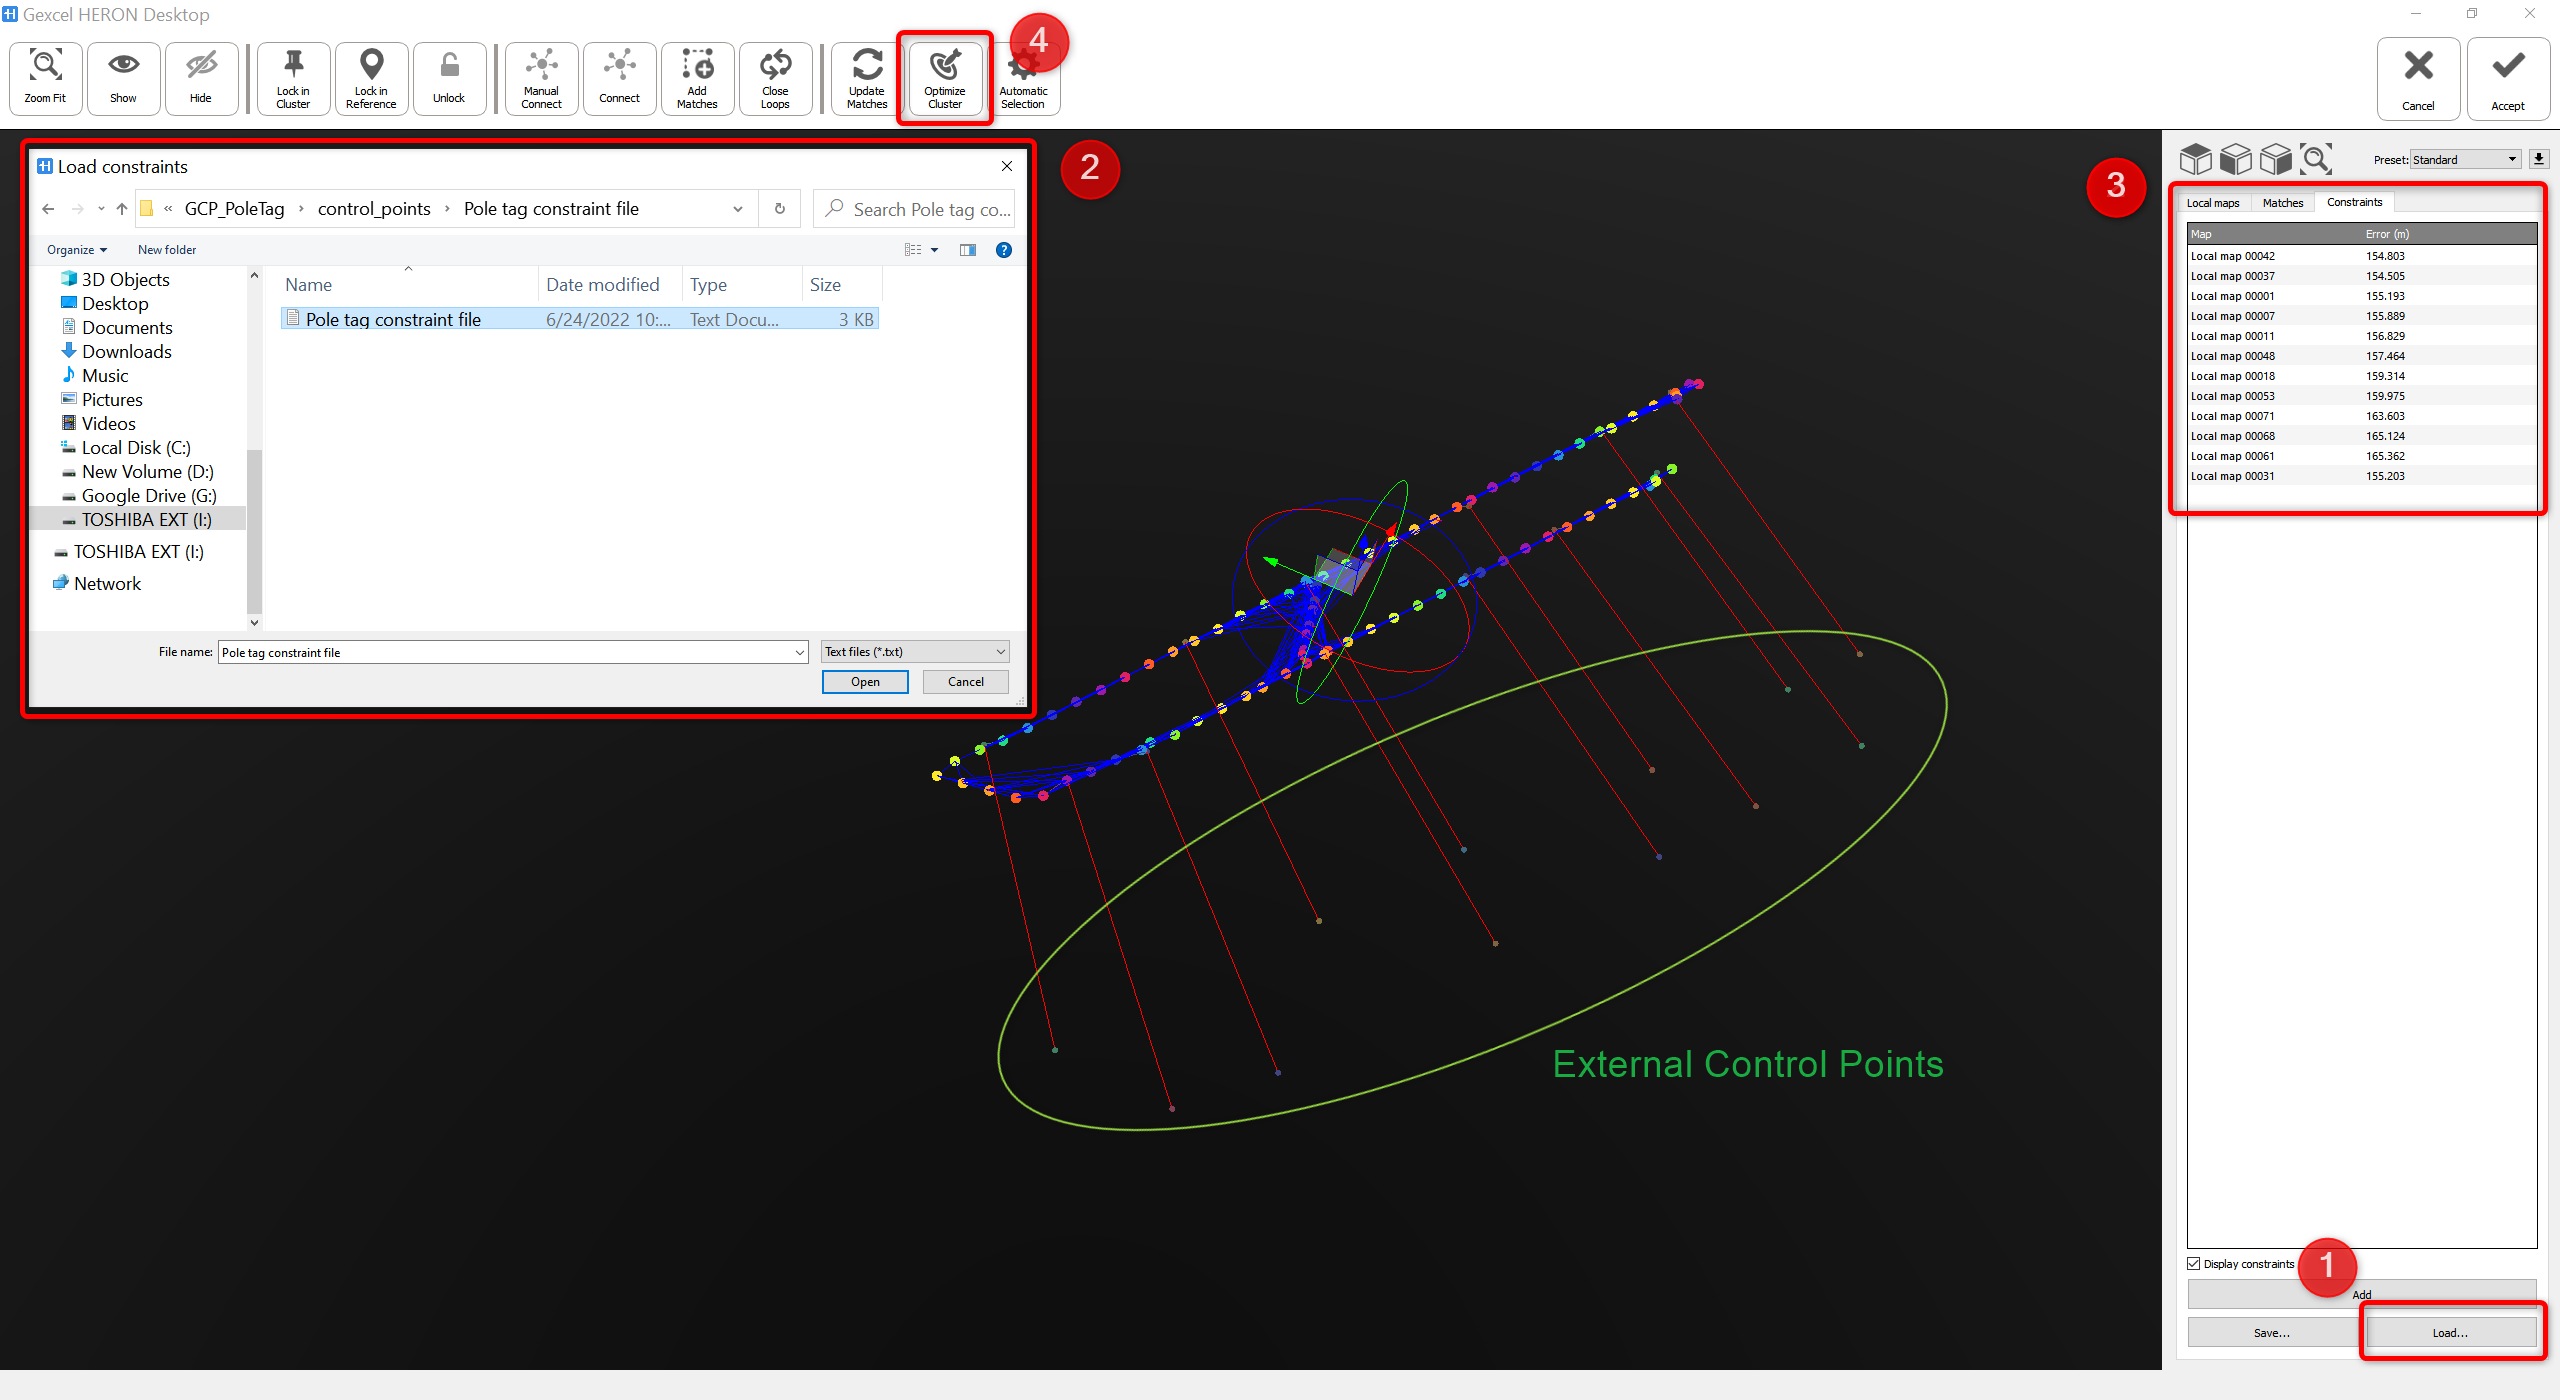
Follows the 4 steps shown in the image below:
- ➊&➋, in Constraint tab, to load the constraint file. The matching error between local maps and external points is displayed on ➌
- ➍press Optimize Cluster (Standard preset) to globally optimize the HERON® trajectory with respect to the external constraints
![]() It is recommended to run Optimize Cluster with Standard preset; Heron data verticality is defined by the GCPs.
It is recommended to run Optimize Cluster with Standard preset; Heron data verticality is defined by the GCPs.
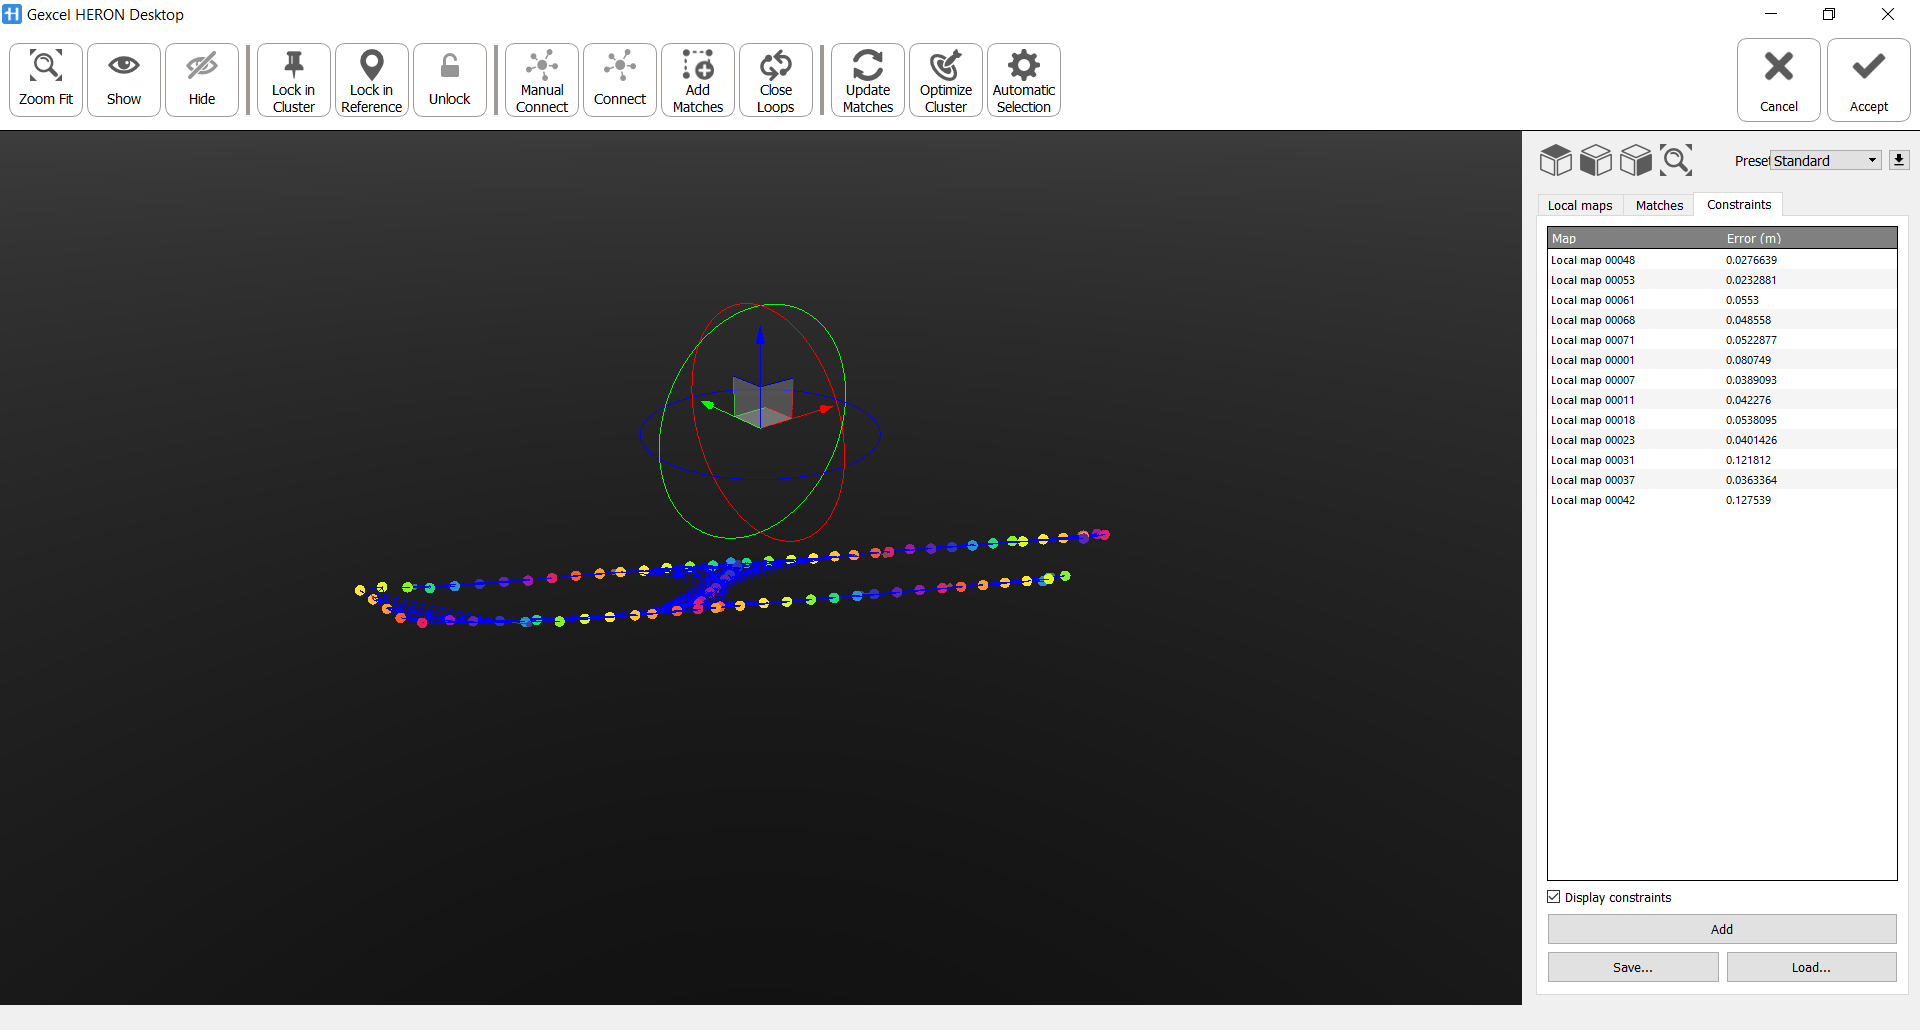
In the main 3D workspace, the software will present:
- individual dots as GCPs
- red connection between GCPs and local maps
And on the right, in the Constraint tab, we can see the relative error between GCPs and Reference points in their Local maps. At this step, as shown in the below image, go to Local Maps tab, select the Cluster and click on Optimize cluster to optimize the HERON® project with respect to GCPs.
During the optimization, the GCPs are used to constraints the HERON maps and consequently to adjust the final trajectory.
The final result can be expected as close as the accuracy of survey instrument which is used to acquire GCPs.
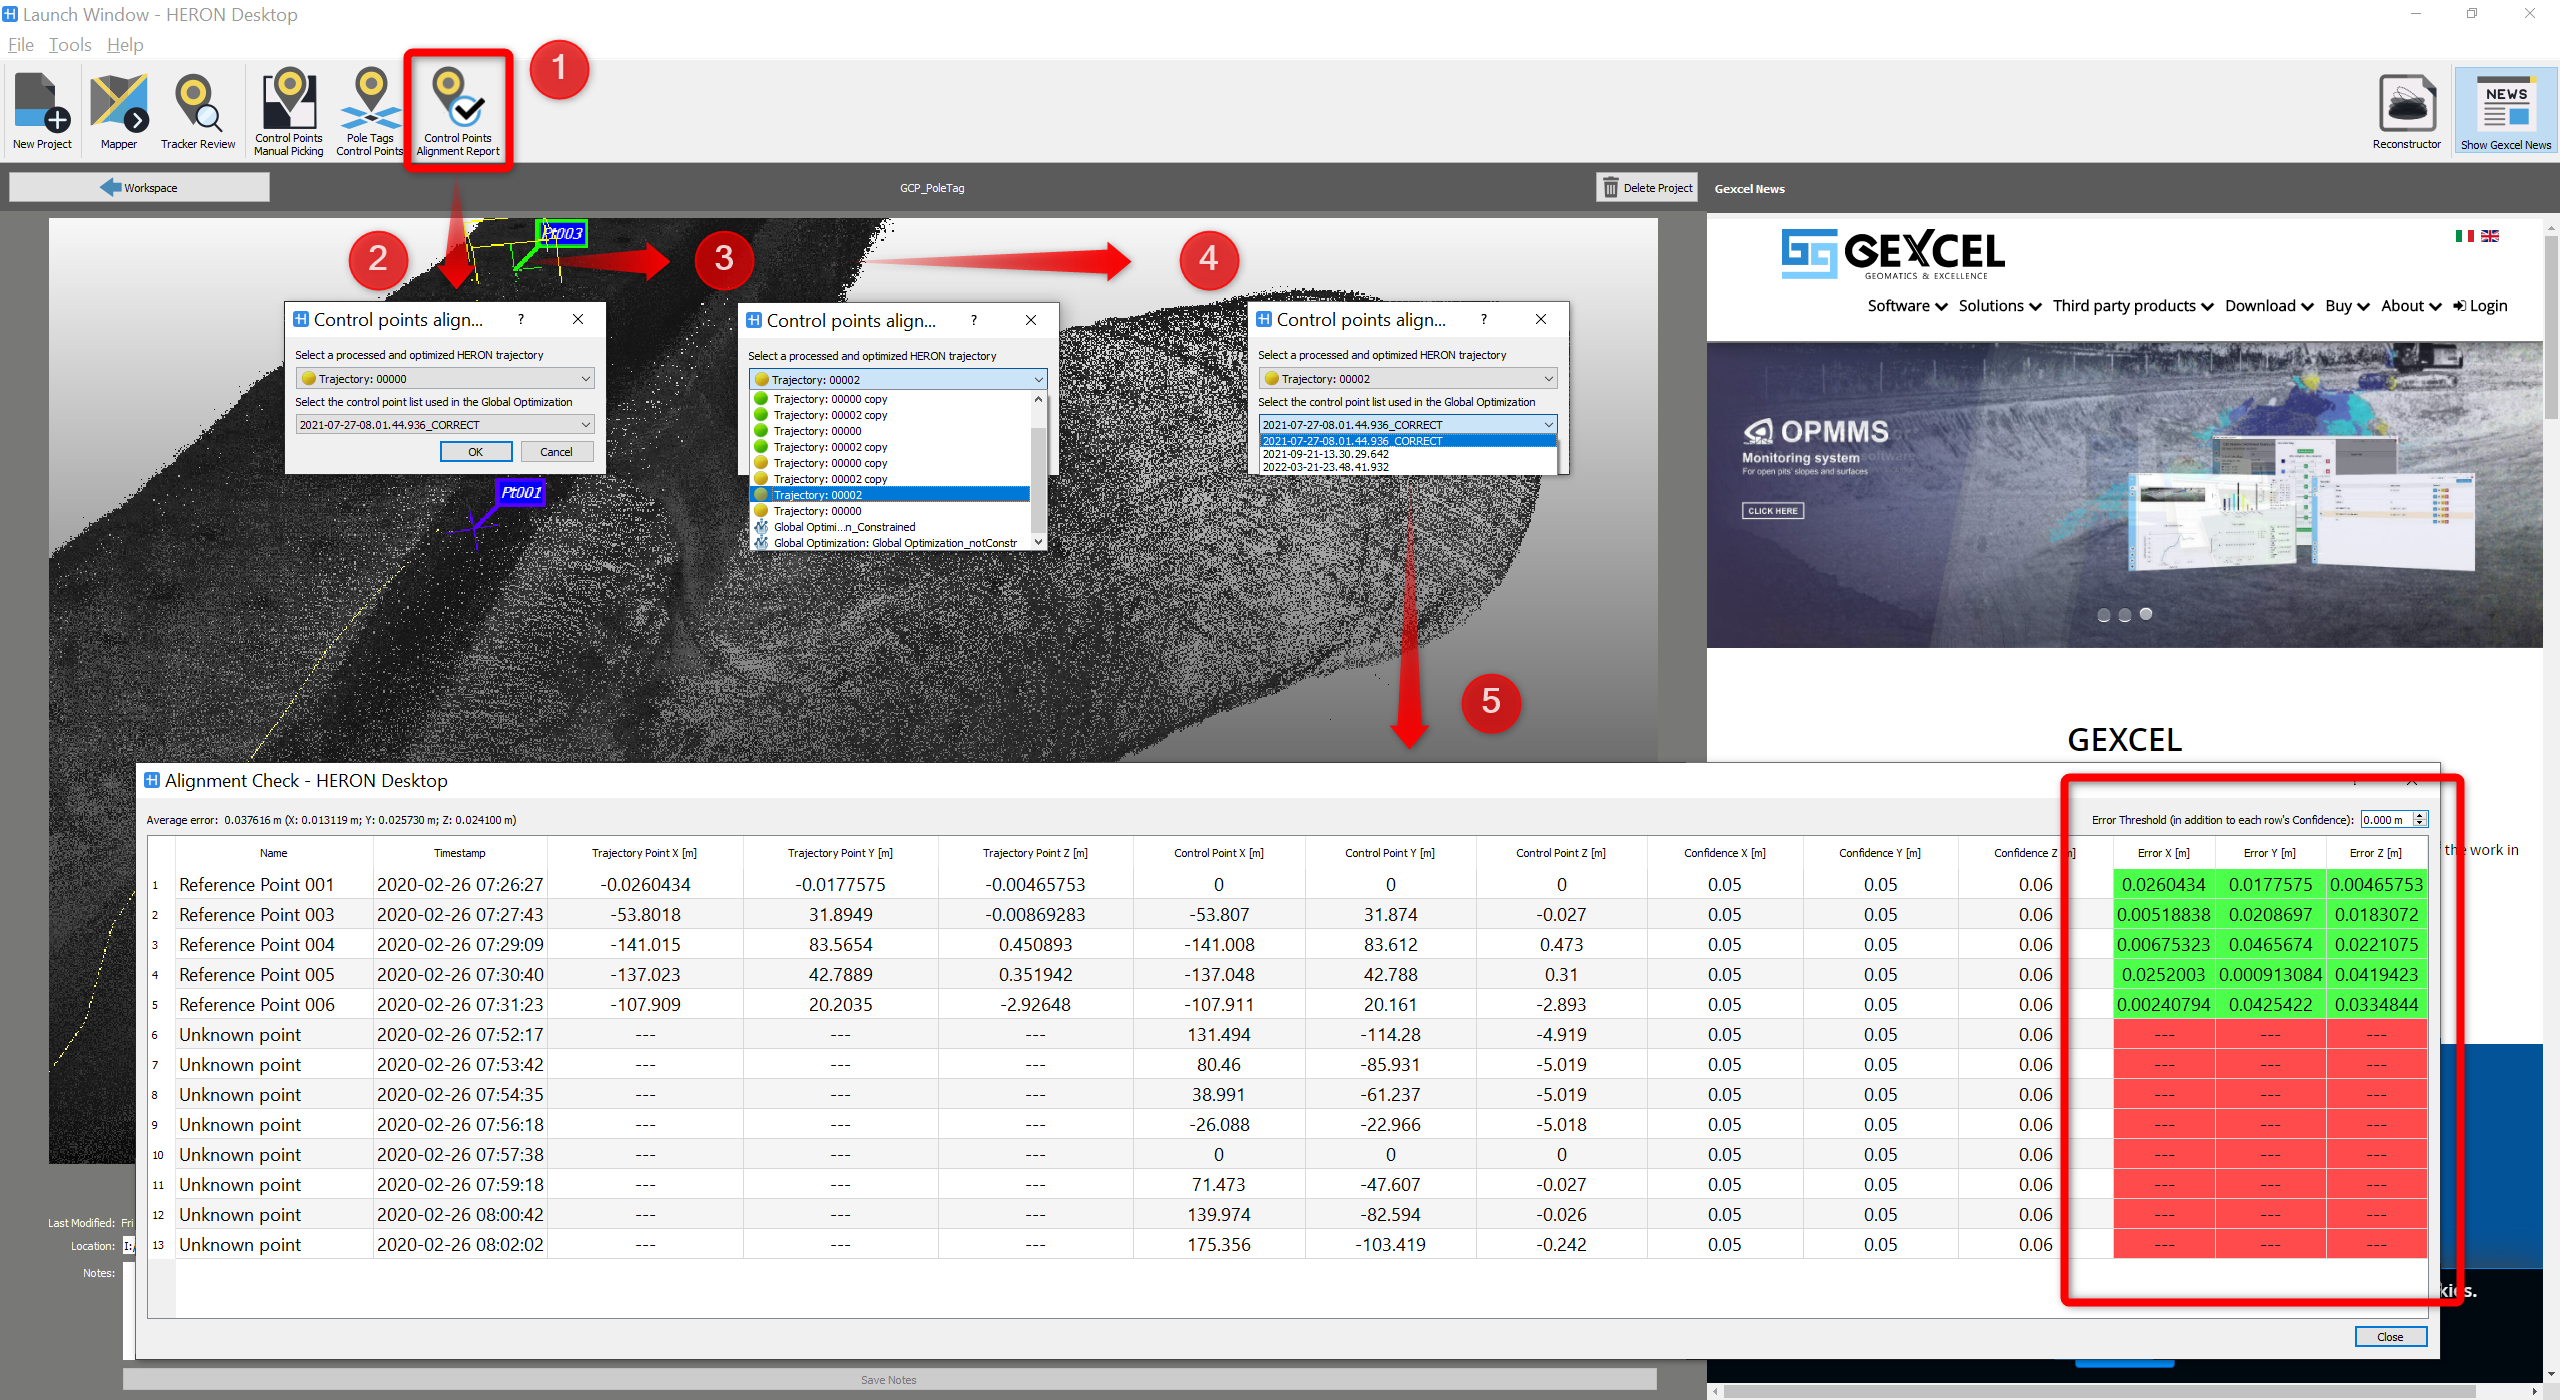
To have the report of the Global Optimization effect in correspondence of the control points with respect to each components of X Y Z, close the Mapper workspace and get back to Launch Window of HERON Desktop then follows the steps from ➊ to ➎ in the image below:
- Press the button Control Points Alignment Report
- Select a processed and optimized (with constraints) HERON trajectory from the drop-down list which includes all trajectories of this HERON Desktop project,
- Select the point list file used in this optimization and click on OK.
All the details will be listed in the Alignment Check in the Launch window.
Now the data is ready to be go to Reconstructor®.
![]() Notice that, when importing this data to Reconstructor®, in Import Heron Data window, Control Points option should be checked; from the drop-down list of Import UCS from, the correct constraint file for the project should be selected.
Notice that, when importing this data to Reconstructor®, in Import Heron Data window, Control Points option should be checked; from the drop-down list of Import UCS from, the correct constraint file for the project should be selected.
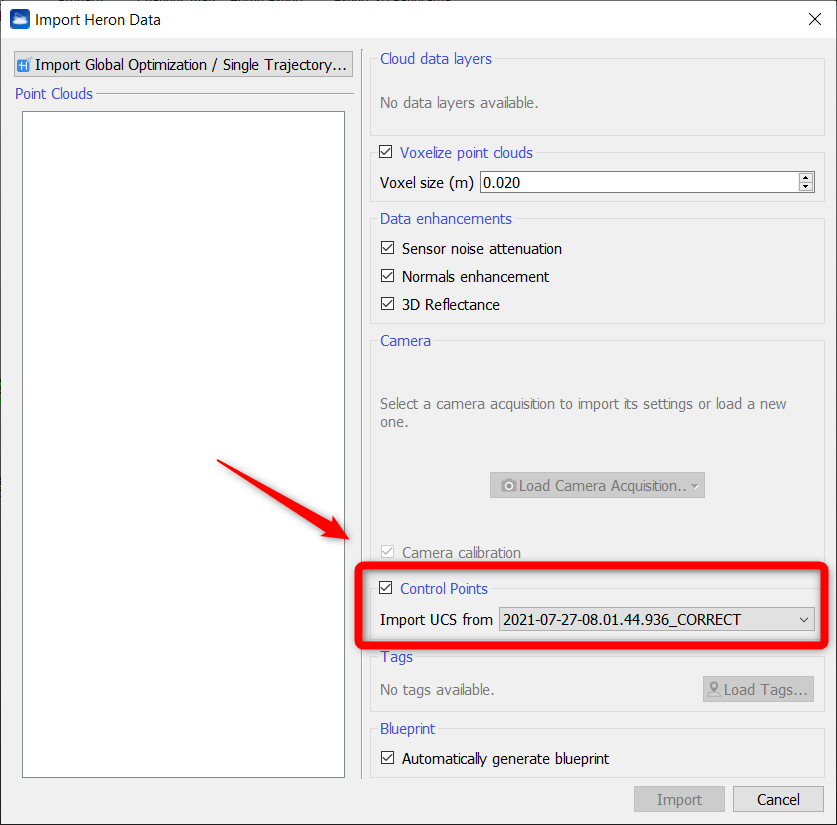
Once the importing process is done, HERON® data will be in the GCPs' reference system.
Follow the step-by-step video tutorial to learn how to run the Pole Tag Control Points workflow.
![]() It is recommended to introduces this constraints step on trajectories that have already been processed, at least with Odometer step, and even better with steps Create Maps and Global Optimization, in order to get better results.
It is recommended to introduces this constraints step on trajectories that have already been processed, at least with Odometer step, and even better with steps Create Maps and Global Optimization, in order to get better results.
This is why there is a Trajectory position (Yes/No) item in the Coordinates Manager dialog that serves as a reminder of whether or not the tracklet has already been processed.