Tracking and Change detection Workflow
![]() These functions are available only if the Tracking add-on is licensed.
These functions are available only if the Tracking add-on is licensed.
HERON® has been design to work also as a localization system and it has the capability to localize itself with respect to reference map.
A reference map can be created starting from:
- a previous acquisition done with HERON in the same area,
- a survey of the same area with a TLS or another 3D sensor (drone, mobile system, etc)
- or even a CAD/BIM model.
The input data to prepare a reference map has to be processed in Reconstructor® and imported in HERON® Desktop. Please find all information in Prepare Reference Map that explains how to create a reference map for HERON®.
The tracking and change detection workflow allows to align each cloud of a Heron survey with a reference map providing two major results:
1. An accurate trajectory and a related final point cloud accurately aligned with the reference map (see Tracking odometer workflow)
2. A change detection map, that is a points cloud aligned with the reference map with three (editable) classes: unchanged, small changes [e.g. 0.1-0.2 cm], large changes [e.g. >0.2 cm] (see Change detection workflow)
The first five steps, reported here below, are the same for both workflows. At the end the user can choose between the creation of a final trajectory (and related cloud) aligned with the reference map (Tracking odometer) or the generation of a change detection map (Change detection).
STEP 1
First of all, it is necessary to create a reference map. For details see here.
STEP 2
Select a trajectory and press the Tracking odometer button ![]() in the Mapper.
in the Mapper.
STEP 3
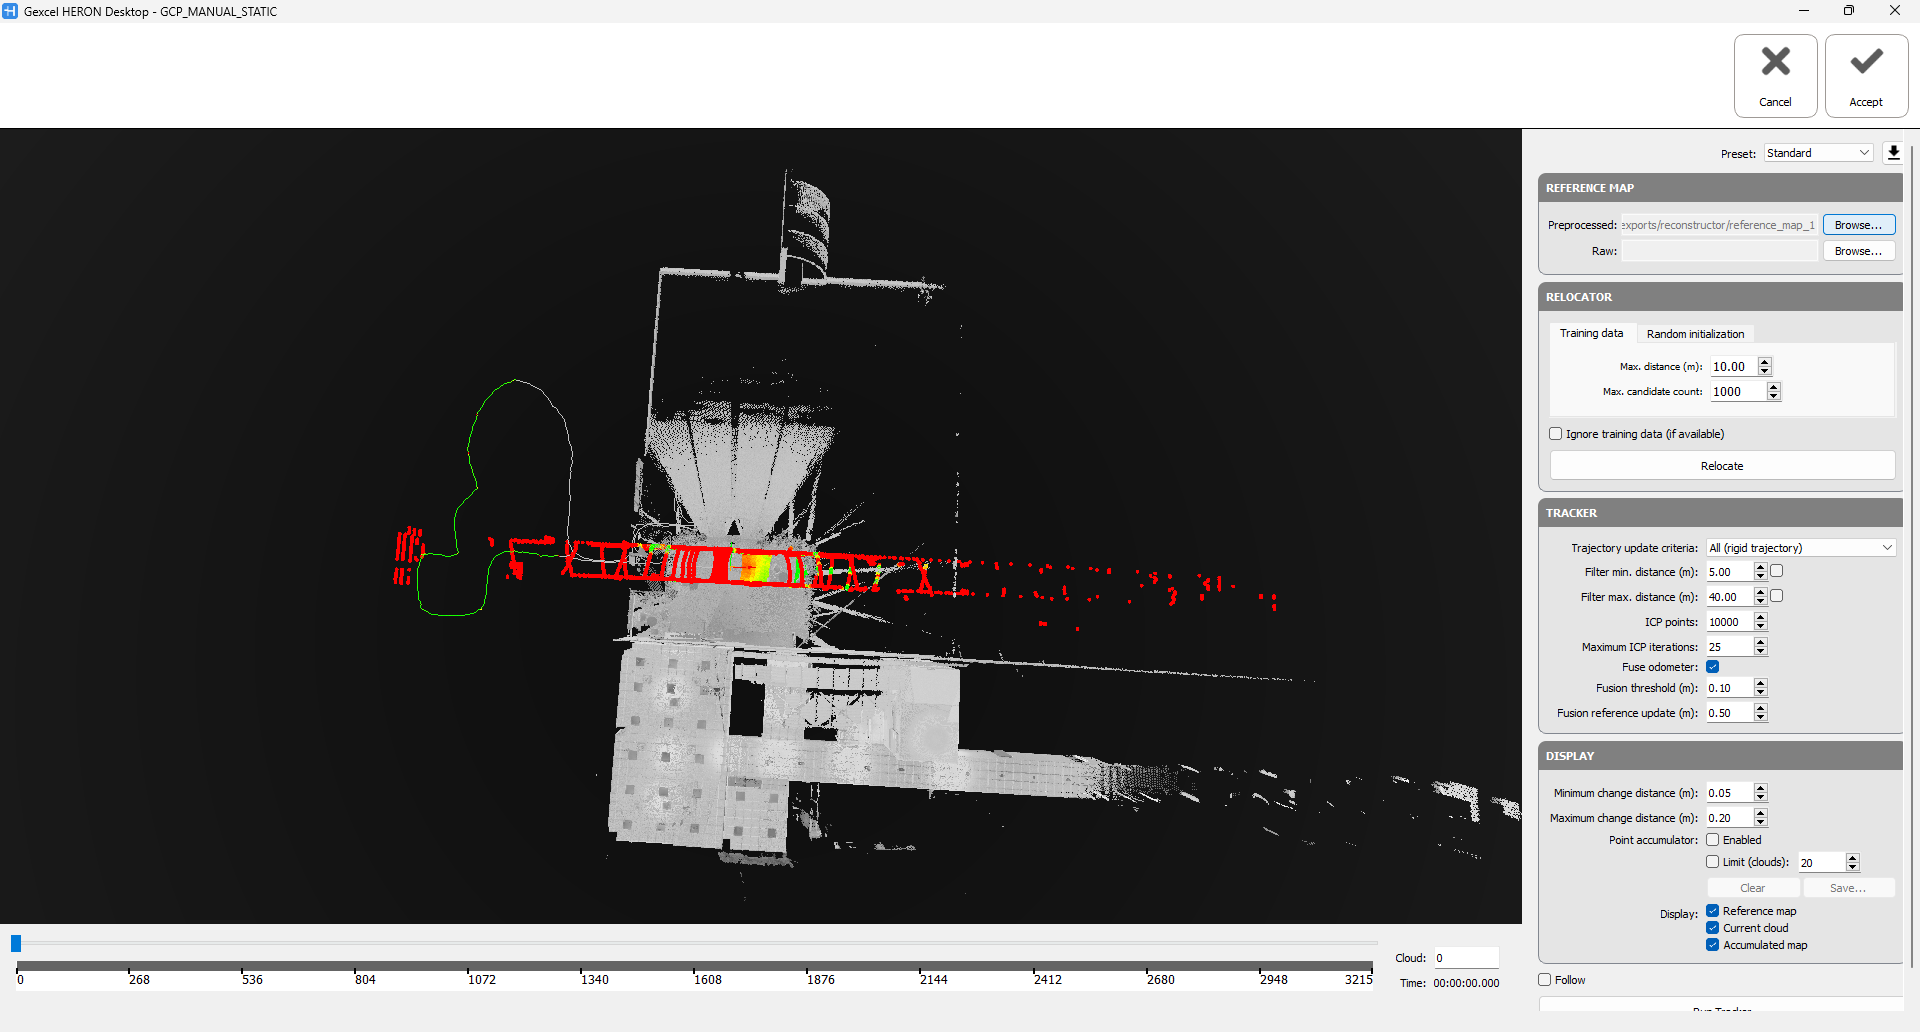
Load the reference map pressing Browse in the Preprocessed tab. The reference map will be displayed misaligned with respect to the trajectory.
STEP 4
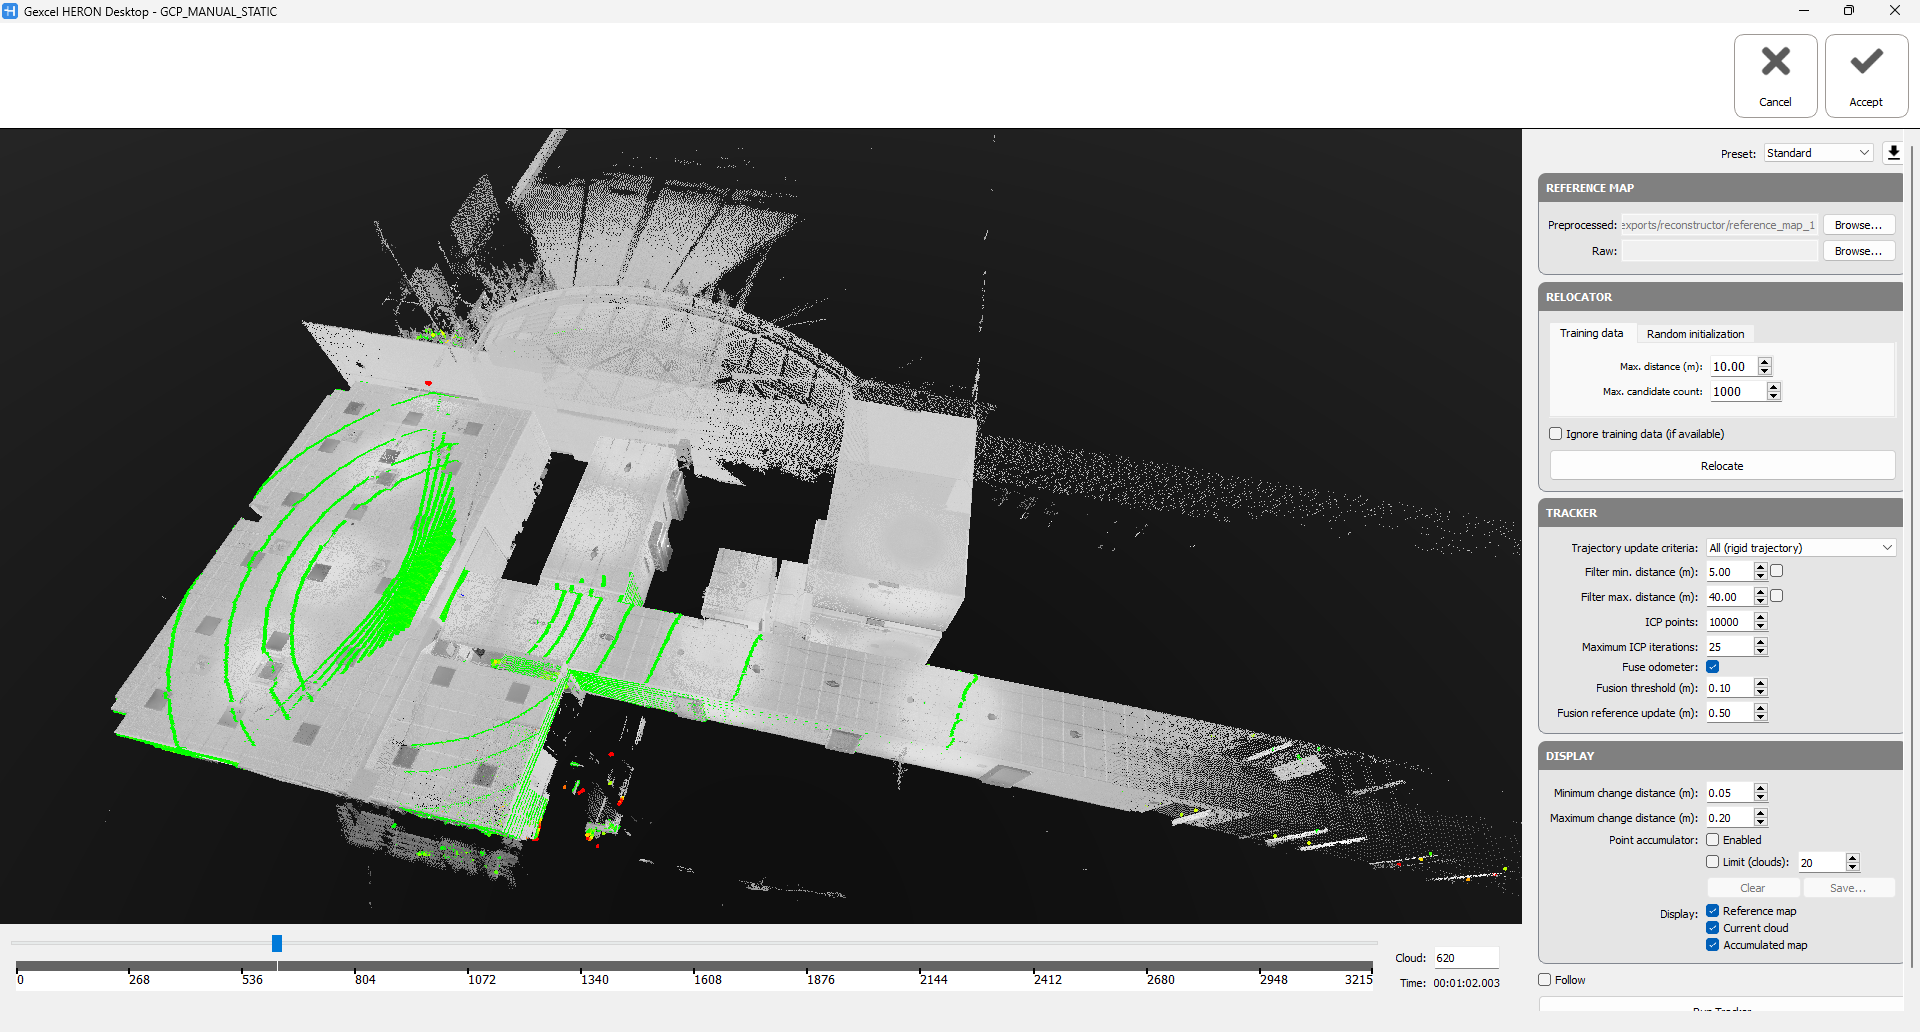
Localize (align) the selected trajectory with the reference map. To do that in the TRACKER options choose the Trajectory update criteria "All (rigid trajectory)".

Double click on a point in the reference map in correspondence of an area that clearly overlaps with the current cloud of the selected trajectory. To do that is also possible to scroll along the trajectory to identify an areas easy to be aligned.
If the registration is successful, the trajectory will be automatically aligned with the reference map and most of the clouds will be marked in green.
STEP 5
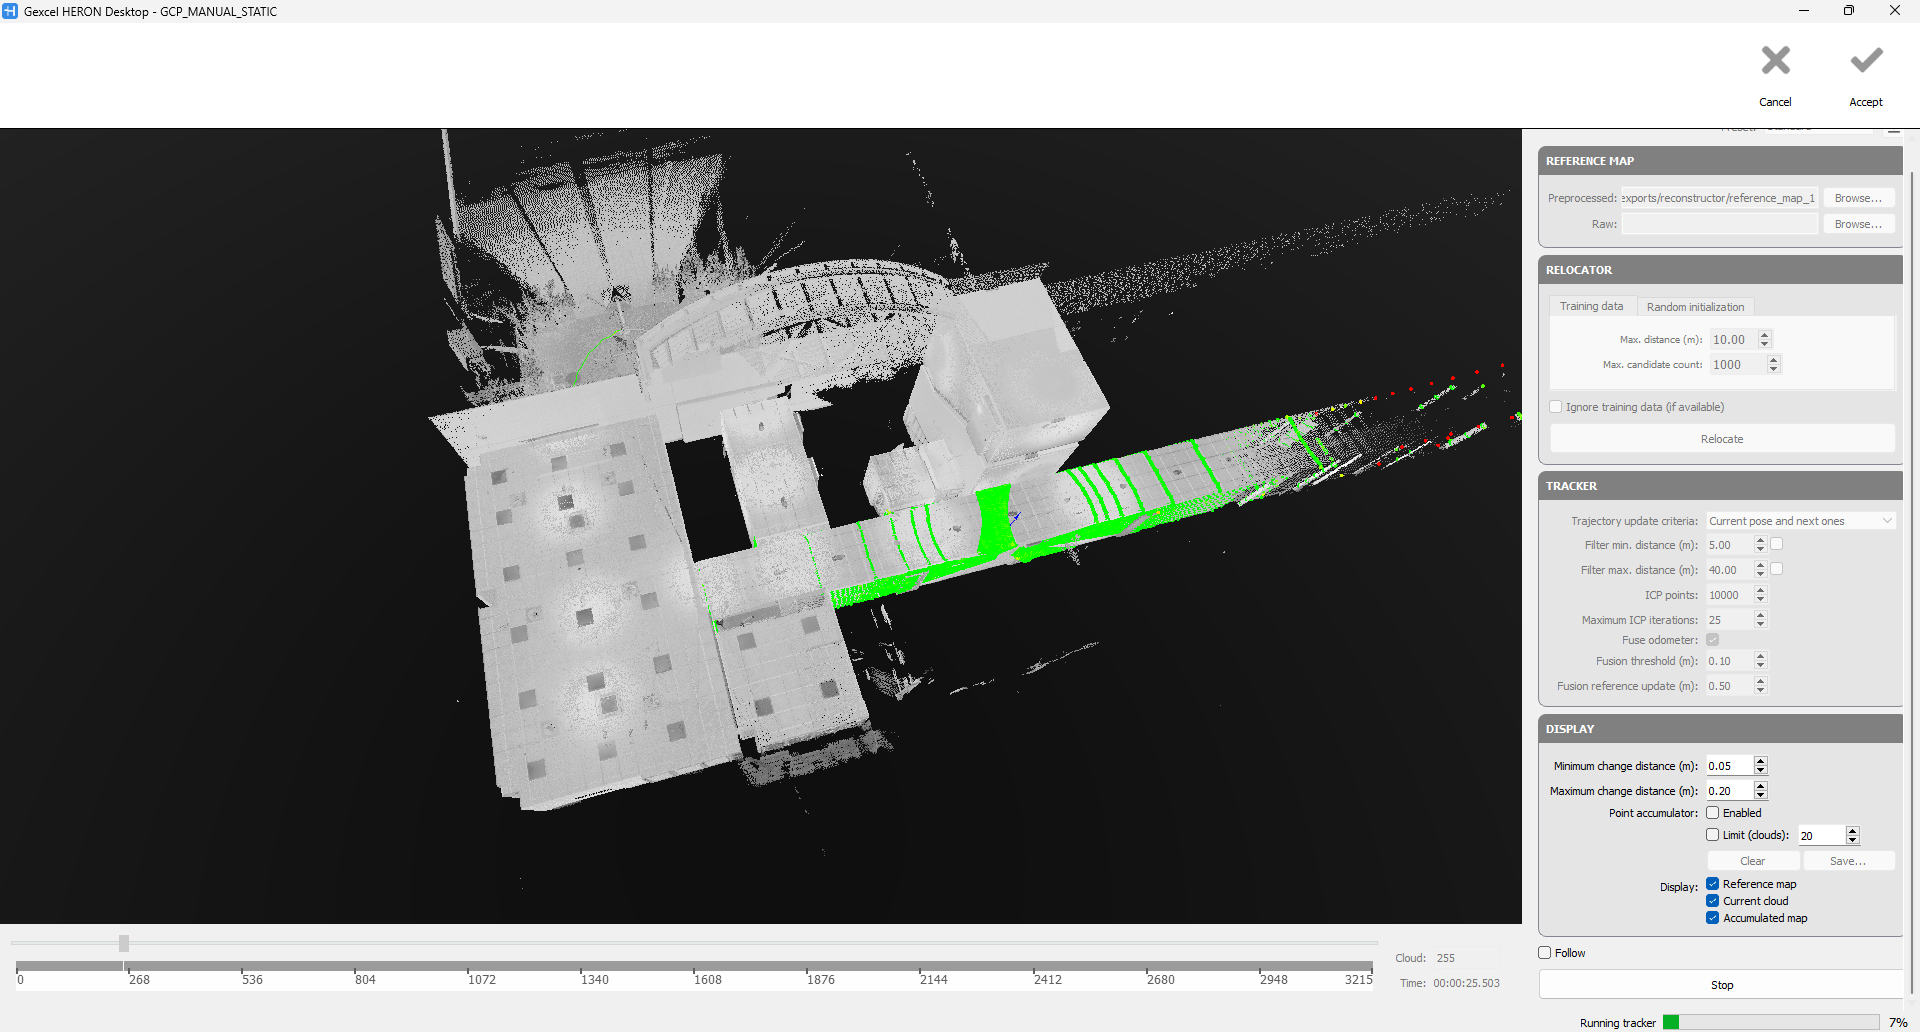
Scroll back at the beginning of the trajectory, select the "Current pose and next ones" in the Trajectory update criteria, and press Run Tracker button.
After the process, you have the option to follow one the following workflows: