ICP Registration
ICP Registration is an algorithm to automatically perform fine registration of a moving point cloud against one or more reference clouds. The moving cloud must be roughly close to the reference cloud. It is possible to roughly align the moving cloud by pre-registering it.

ICP parameters
Below all the details.

Accessing the ICP Registration dialog
You can access this dialog from the button Registration in LineUp's top toolbar.
The ICP algorithm works on both structured and unstructured point clouds. The requirement is that the point clouds have the normals calculated, i.e. have the Inclination among their colors. If a point cloud doesn't have the inclination, during processing ICP will issue an error message. Inclination can be computed for grid point clouds during preprocessing.
Just drag and drop point clouds from the project window to the ICP dialog to register them. The clouds will appear in the top-left list in the dialog.
Setting the clouds' registration roles
In the top-left list, each cloud is listed with its name and its registration role. By clicking the button at the right of any cloud's name, you can select its registration role among three: each cloud can in fact be a reference scan, or a moving scan, or simply not used.
A reference scan will remain still in its position during registration, while a moving scan will be moved to align it better to the reference clouds. You can have as many reference scans as you want, but you must have exactly one moving scan to run ICP.
Example: suppose you need to register 10 clouds together. You may want to drag and drop them all onto the ICP dialog, then register the first two, then register the third using the first two as reference, and so on, gradually registering the point clouds on the ones already registered.
Using a preregistration report to finely register a set of clouds
If you have a set of clouds already preregistered using automatic preregistration, you can automatically run in batch a sequence of ICPs that will register your clouds. Press the button Start from preregistration report, then select the preregistration report you want to use (usually found in the Results/Reports project folder). Below the button, a confirmation message appears ensuring that the report has been correctly loaded and that you can press Process to register all your clouds. After that you have loaded the preregistration report, you are not allowed anymore to change the registration roles, since the reference and moving scans are already defined by the report. This technique will use the minimum number of pairwise ICPs to register your clouds: if you have N clouds, N – 1 ICPs will be needed, as many as the edges of the minimum spanning tree that connects all your clouds. The information about which is the minimum spanning tree is contained in the preregistration report.
Comparison with Bundle Adjustment. Reconstructor® offers two algorithms to finely register a set of point cloud starting from a preregistration report: the one usable via this dialog, and Bundle Adjustment. Which one to use?
As said, the algorithm available here uses the minimum possible number of ICPs to connect your clouds to each other. Therefore, if your clouds form closed sequence (e.g. a loop around a building, or inside a hall), you have no guarantees that the first cloud will be aligned with the last. Bundle Adjustment, instead, is designed to use as many ICPs as possible, to connect each scan with all its neighbors in order to globally register all your data.
In conclusion: if your scans are positioned in a strict sequence, you should use the present method, because bundle adjustment may try to register together clouds that have no significant overlap with each other. If, on the other hand, your scans form a loop or a closed sequence, you should definitely avoid the present method and use a bundle adjustment.
Setting the ICP parameters
ICP stands for Iterative Closest Point. The algorithm finds points on the moving cloud that are close to the reference clouds. These points are called control points or inliers. The algorithm then iteratively moves the moving cloud to reduce the distance of the control points to the reference models. After each step of movement, the control points are recomputed.
Once the reference and moving clouds are set, the user can also tune several parameters of the ICP algorithm, displayed in the Parameters box on top right of the dialog. The default parameters should work fine for most cases. However, here a full explanation of the ICP parameters is provided.
ICP parameters are divided in three groups: parameters that define how to search for inliers, parameters that define the convergence criterion, and parameters that define registration constraints.
- Max search distance. If the models have a bad pre-registration, try to increase the Max search distance, but the process will be slower.
- Number of control points. Tune the number of control points to the size of the models. The model to register (not the reference) is sampled with Number of control points. At the beginning of ICP, a search distance S is computed. Control points from the moving cloud are considered only if they are closer to the reference models than S. S is calculated so that it is betweenMinimum search distance and Maximum search distance, and so that at least Sufficient control points can be found in the moving cloud to be closer than S to the reference clouds. If such an S cannot be found, for example because the clouds are too far away and therefore the control points are too few, ICP stops and an error message is issued.
- Sufficient control points. See explanation above.
- Minimum search distance. See explanation above
- Min number of control points. During ICP iterations, the control points are recalculated. If at a certain iteration they are fewer than this value, ICP stops and an error message is issued.
- Max normal divergence [deg]. Two points close to each other are considered not matching if their normals are diverging more than this angle. This is useful to filter out from the registration noisy data like vegetation, foliage, or moving objects like cars or people. The assumption is that points belonging to the same object should have also the same normal direction.
- Min. scan bounding box overlap (%). At the algorithm's beginning, the moving cloud's bounding box is compared with the bounding box of each one of the reference clouds. If the overlap between the bounding boxes is lower than this value, the reference cloud is not considered by the algorithm.
Convergence criterion parameters
- Registration error [m]. Tune this parameter to select the desired registration accuracy. ICP will stop iterating if the mean registration error goes below this value. The other parameters that influence ICP's stop criterion are: Registration delta-change and Maximum number of iterations.
- Registration delta-change (%). ICP stops if the error-delta between three iterations is smaller than this parameter. Let's call this parameter d. Let's also define e(n) to be the mean registration error at iteration n. ICP will stop iterating if, at iteration n, [(e(n – 3) – e(n)) / e(n) ] < d.
- Minimum number of iterations. ICP will execute at least this number of iterations, and then will start checking the break criterion.
- Maximum number of iterations. ICP will do at most this much of iterations.
ICP constraints
- Vertical is fixed. Set it to true if you know that the moving scan is already set on its vertical in the current UCS.
- Translation is fixed. Set it to true if you want to constrain the origin of the moving cloud to be fixed. This is useful if you know with great precision (e.g. via total station) the coordinates of the scan's origin.
When the parameters are set, press the button Process on bottom left. ICP begins, showing log messages in the right-central Result panel of the dialog. Also, the graph on bottom right displays the error histogram for each iteration. This is useful to see at a glance whether the algorithm is converging.
Finishing the registration
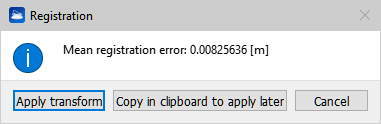
After finishing the registration, the dialog pictured above shows you the mean registration error and offers you three options: to immediately apply the registration to the moving grid, to copy the registration transform to clipboard to apply it later, or to cancel if you don't accept the error. You may want to copy the transform to the clipboard if you want to move more grids according to the same transform. This is useful for example if you have a group of say 10 grids already registered among them, to be registered against other 10 already registered among them.
To apply “later” a registration transform stored in the clipboard, select in the project window the grids you want to apply the transform to, right-click on them and select Registration->matrix transform from the context menu. Then select Apply registration transform in the Matrix transform dialog.
When the registration is finished, the grids are unloaded from the project to free memory. Please reload them to see them rendered.
See Scan alignment per groups.