View, Navigation and Select points tools

View tools
On the right of the Top Toolbar there are three commands containing the main functions related to the possible views, the screen settings and the parameters of the current view.
|
|
Several 3D and 2D views are here available to visualize the models in the most functional way. |
|
|
To set different screen and display options. |
|
|
To choose and manage Perspective or Orthographic views. |


Navigation tools
Different Navigation modes are available; between them the Pivot Mode is the default and most used.
|
|
Default navigation mode based on translating and rotating around a chosen point of the 3D scene |

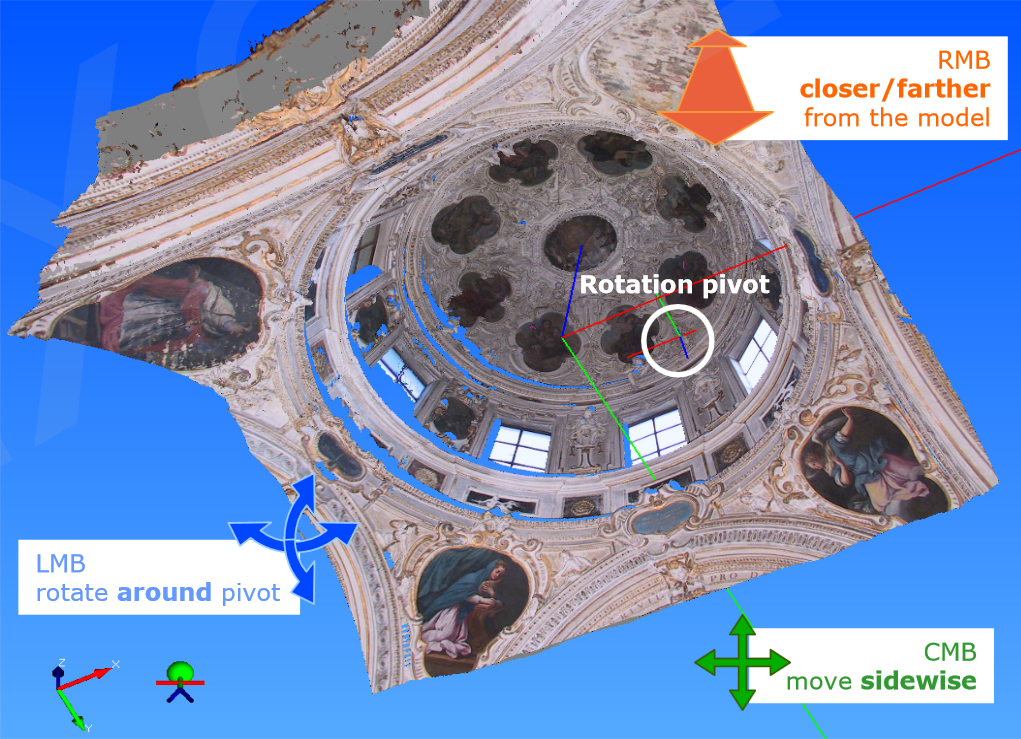
In this mode a point can be selected as a rotation pivot. The pivot is set by a left button click on a valid point of an object.
|
Keyboard/mouse movement |
Effect |
|
|
LMB + move mouse |
Camera rotation around the pivot |
|
|
CMB + move mouse |
Camera sideways translation, pan |
|
|
RMB + move mouse back/forth |
Camera dollying, forward and backward along the current focal axis |
|
|
Mouse wheel rotation |
Translation towards point indicated by the mouse pointer |
|
|
Shift + LMB + move mouse left/right |
Camera rolling |
|
|
LMB click on a model's point |
Selection of rotation pivot |
|
|
Shift + mouse wheel rotation |
Zoom in and out (change of field of view) |
|
|
Alt + LMB double click |
Selection of points for point list window |
|
|
Shift + CMB + mouse move |
Draw rectangle to move into |
|
|
LMB double click |
Select the item |

The Bubble mode may instead be useful to put yourself in the laser scan's point of view.
|
|
Navigation mode in which only rotations around yourself are allowed |
See the Navigation chapter for details and other navigation modes.
Select Points tools
The last command on the right of the Top Toolbar is dedicated to:
|
|
This tool opens a recipe window to select, delete, hide and classify points. A set of captured points can also be saved as a point cloud. To |